Create a Local VM on Windows (Hyper-V)
On Windows you can run a meltcloud Nest or Machine as a local VM using Hyper-V.
Recommendation
We recommend Hyper-V: it supports nested virtualization, and its Default Switch provides the required connectivity (host to VM, VM to VM). See Other Virtualization Tools for alternatives.
VM Settings
| Setting | Nest | Machine |
|---|---|---|
| Generation | Generation 2 (UEFI) | Generation 2 (UEFI) |
| vCPU | 8+ | 2+ |
| RAM | 16 GB+ | 4 GB+ |
| Disk | ≥ 200 GB | ≥ 20 GB |
| Networking | Default Switch | Default Switch |
| Nested virtualization | not required | optional, required for Elastic Pools |
| Boot media | Nest installer .iso | Enrollment Image .iso (amd64) |
Static IP addresses (Nest)
The Hyper-V Default Switch DHCP server does not maintain persistent leases across VM reboots. During the Nest installation, in the Networking tab, select Static IPs instead of the default DHCP. The suggested settings should work.
Option A: PowerShell
Enable Hyper-V
Open an elevated PowerShell and run:
Enable-WindowsOptionalFeature -Online -FeatureName Microsoft-Hyper-V -AllReboot when prompted. Hyper-V is available on Windows 10/11 Pro, Enterprise, and Education editions.
Create the VM
# create a Generation 2 VM with 200 GB disk
New-VM -Name "melt-nest" -Generation 2 `
  -MemoryStartupBytes 16GB `
  -NewVHDPath "C:\HyperV\melt-nest.vhdx" `
  -NewVHDSizeBytes 200GB `
  -SwitchName "Default Switch"

Set-VM -Name "melt-nest" -ProcessorCount 8
Set-VMMemory -VMName "melt-nest" -DynamicMemoryEnabled $false

# disable Secure Boot so the VM can boot the .iso
Set-VMFirmware -VMName "melt-nest" -EnableSecureBoot Off

# remove the default empty DVD drive, add one with the ISO, and boot from it
Get-VMDvdDrive -VMName "melt-nest" | Remove-VMDvdDrive
Add-VMDvdDrive -VMName "melt-nest" -Path "C:\path\to\nest-installer-amd64.iso"
$dvd = Get-VMDvdDrive -VMName "melt-nest"
Set-VMFirmware -VMName "melt-nest" -FirstBootDevice $dvd

Start-VM -Name "melt-nest"

# open the VM console
vmconnect localhost "melt-nest"# create a Generation 2 VM with 40 GB disk
New-VM -Name "melt-machine" -Generation 2 `
-MemoryStartupBytes 4GB `
-NewVHDPath "C:\HyperV\melt-machine.vhdx" `
-NewVHDSizeBytes 40GB `
-SwitchName "Default Switch"
Set-VM -Name "melt-machine" -ProcessorCount 2
Set-VMMemory -VMName "melt-machine" -DynamicMemoryEnabled $false
# disable Secure Boot so the VM can boot the .iso
Set-VMFirmware -VMName "melt-machine" -EnableSecureBoot Off
# remove the default empty DVD drive, add one with the ISO, and boot from it
Get-VMDvdDrive -VMName "melt-machine" | Remove-VMDvdDrive
Add-VMDvdDrive -VMName "melt-machine" -Path "C:\path\to\enrollment-image-amd64.iso"
$dvd = Get-VMDvdDrive -VMName "melt-machine"
Set-VMFirmware -VMName "melt-machine" -FirstBootDevice $dvd
Start-VM -Name "melt-machine"
# open the VM console
vmconnect localhost "melt-machine"# create a Generation 2 VM with 40 GB disk
New-VM -Name "melt-machine" -Generation 2 `
-MemoryStartupBytes 4GB `
-NewVHDPath "C:\HyperV\melt-machine.vhdx" `
-NewVHDSizeBytes 40GB `
-SwitchName "Default Switch"
Set-VM -Name "melt-machine" -ProcessorCount 2
Set-VMMemory -VMName "melt-machine" -DynamicMemoryEnabled $false
# disable Secure Boot so the VM can boot the .iso
Set-VMFirmware -VMName "melt-machine" -EnableSecureBoot Off
# enable nested virtualization for Elastic Pools
Set-VMProcessor -VMName "melt-machine" -ExposeVirtualizationExtensions $true
# remove the default empty DVD drive, add one with the ISO, and boot from it
Get-VMDvdDrive -VMName "melt-machine" | Remove-VMDvdDrive
Add-VMDvdDrive -VMName "melt-machine" -Path "C:\path\to\enrollment-image-amd64.iso"
$dvd = Get-VMDvdDrive -VMName "melt-machine"
Set-VMFirmware -VMName "melt-machine" -FirstBootDevice $dvd
Start-VM -Name "melt-machine"
# open the VM console
vmconnect localhost "melt-machine"Option B: Hyper-V Manager
Enable Hyper-V
- Open Settings → Apps → Optional Features → More Windows Features.
- Check Hyper-V and click OK.
- Reboot when prompted.
Hyper-V is available on Windows 10/11 Pro, Enterprise, and Education editions.
Create the VM
Open Hyper-V Manager and click New → Virtual Machine in the right panel.
Name: give the VM a name (e.g.
melt-nestormelt-machine).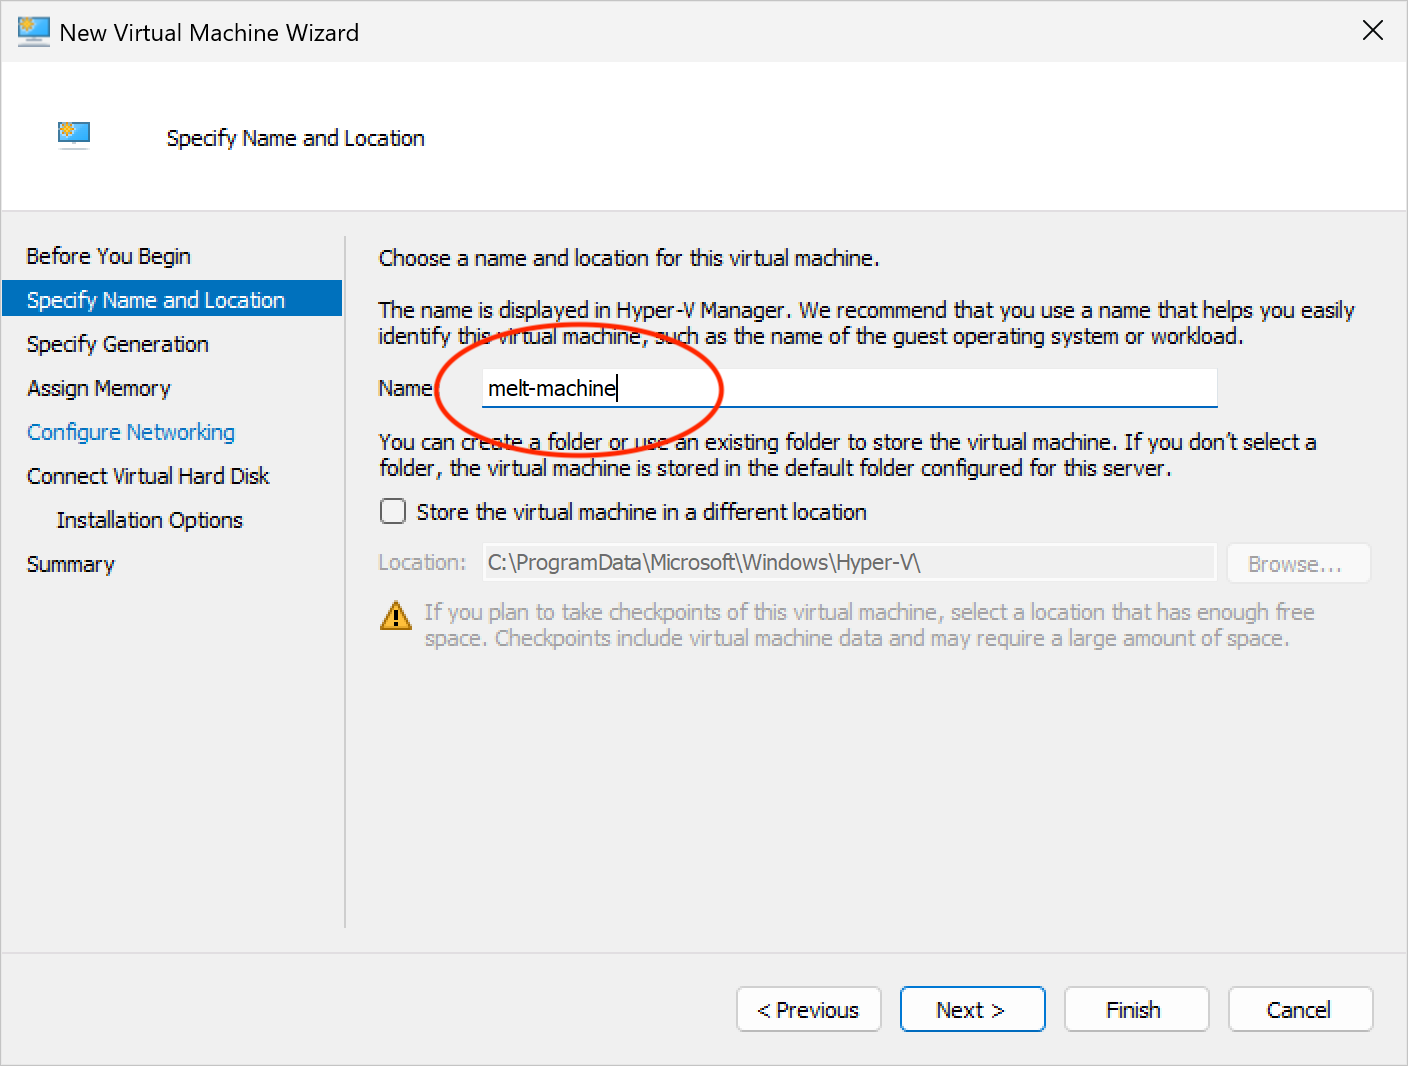
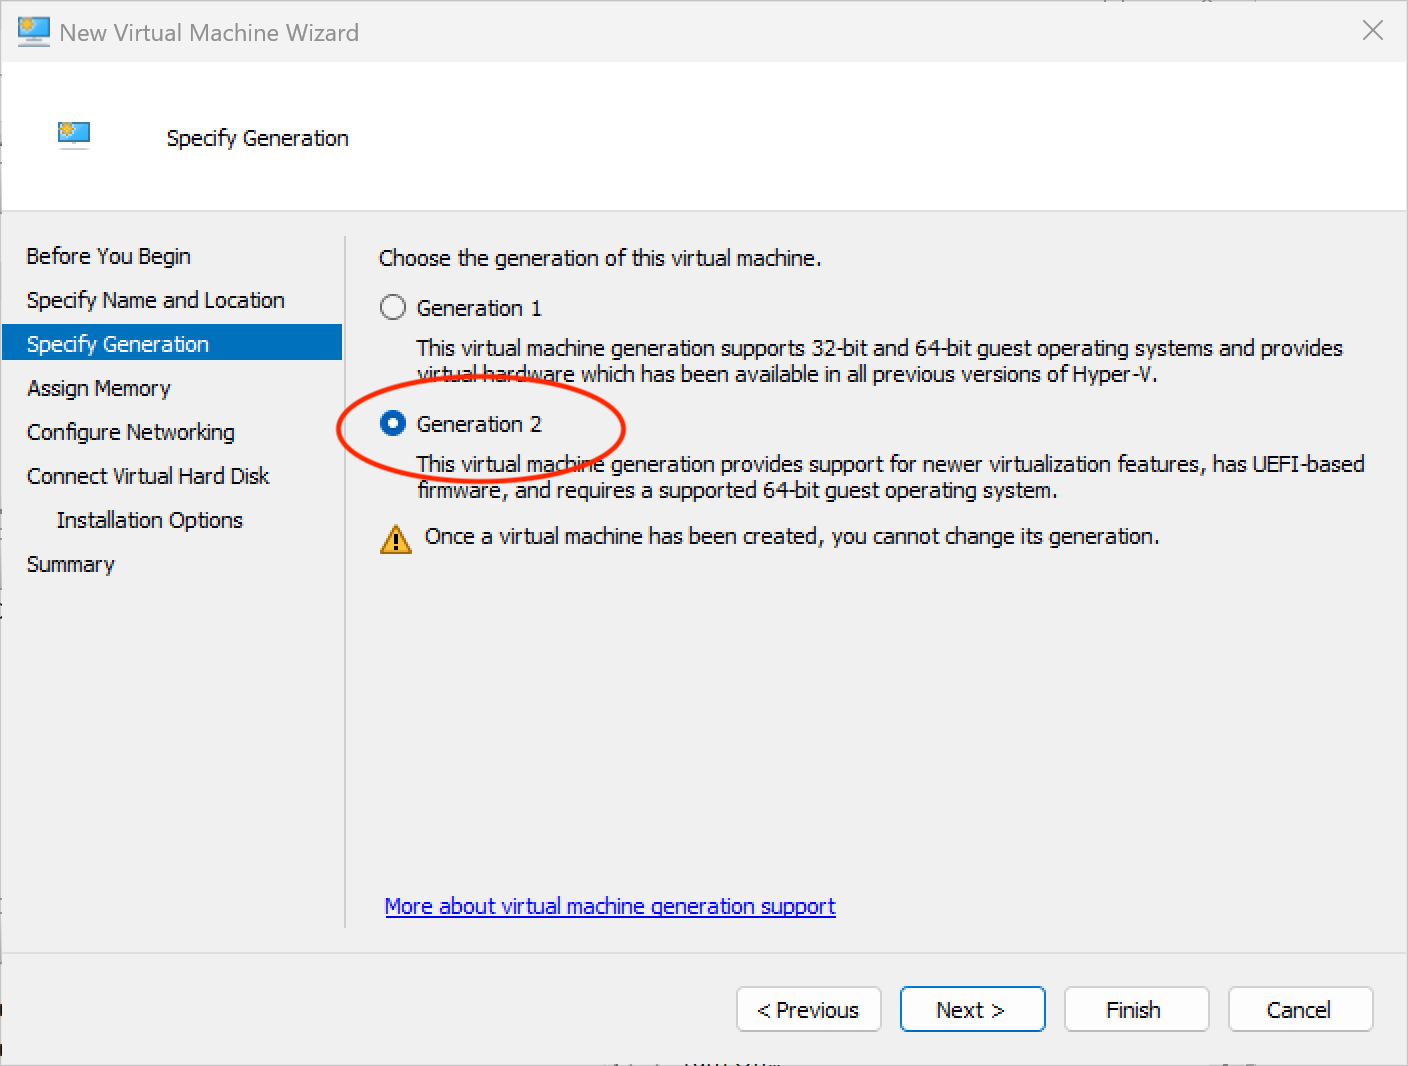
Generation: select Generation 2.
Memory: set the startup memory (see VM Settings above). Uncheck Use Dynamic Memory for this virtual machine.

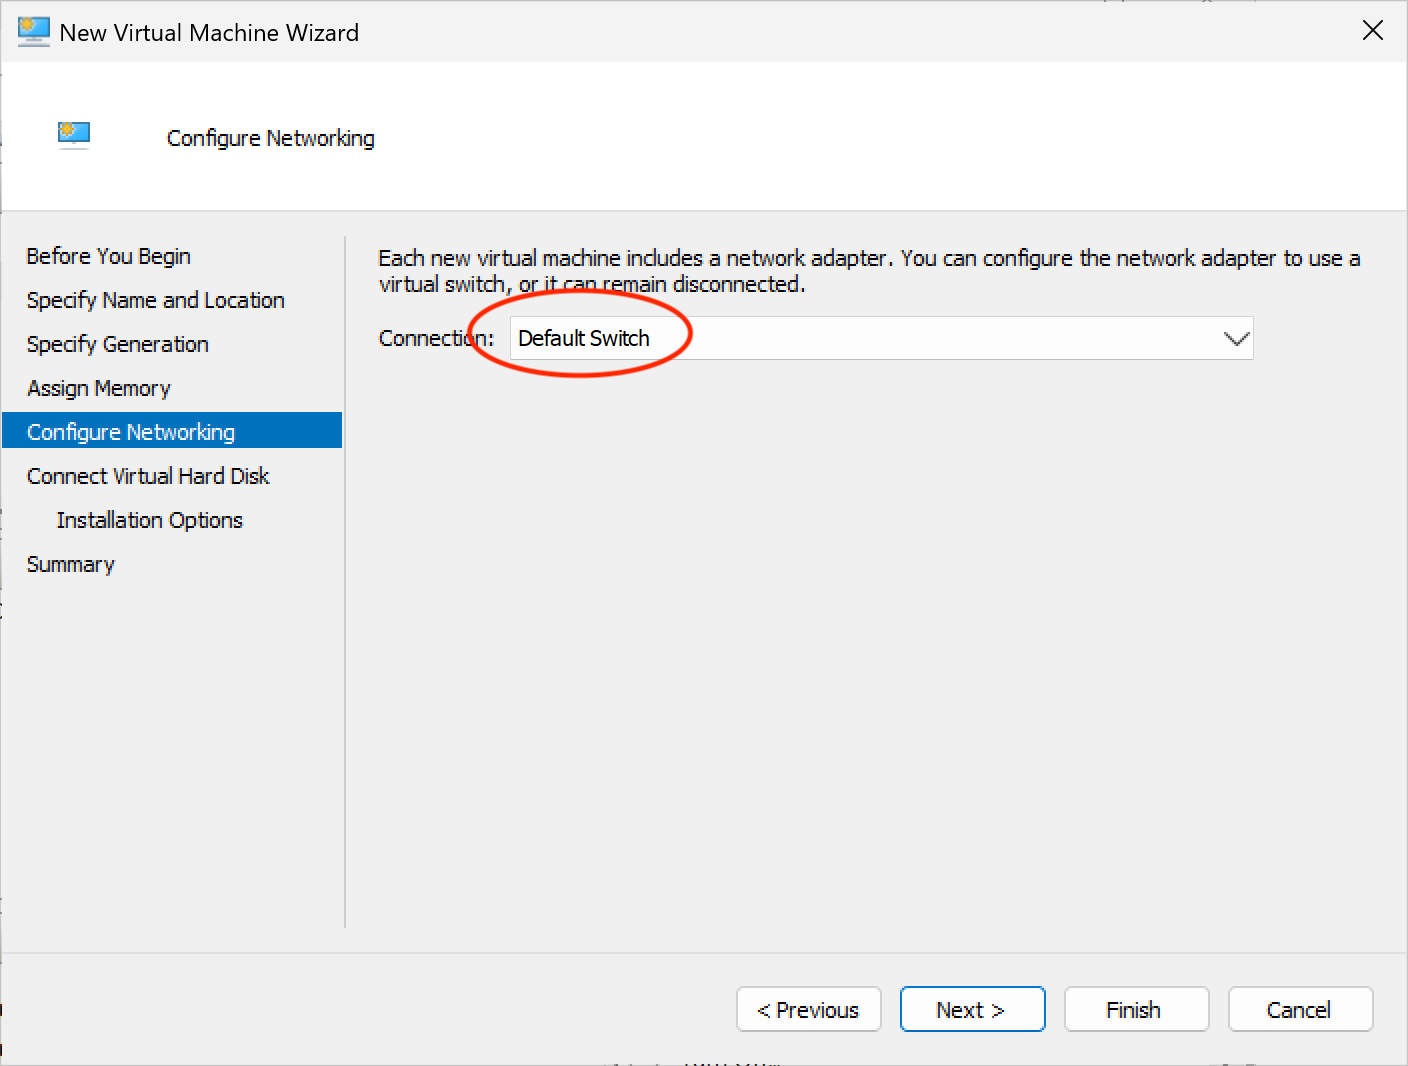
Networking: select Default Switch.
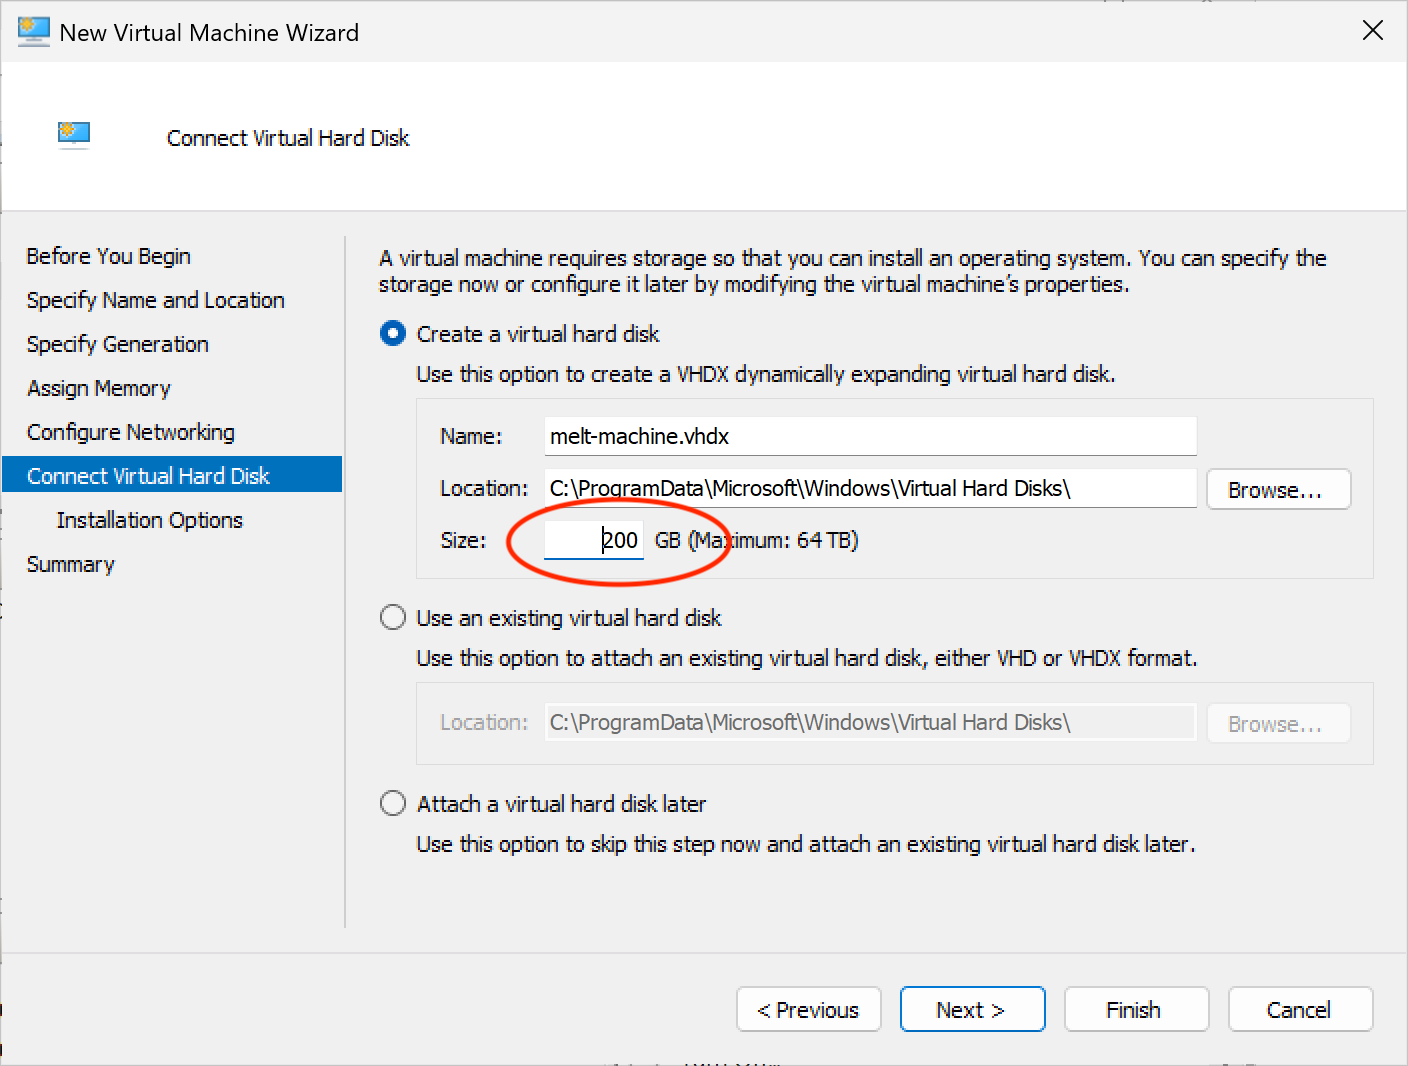
Virtual Hard Disk: create a new disk with the size from the table above.
Installation Options: select Install an operating system from a bootable image file and browse to your
.iso(Nest installer or Enrollment Image).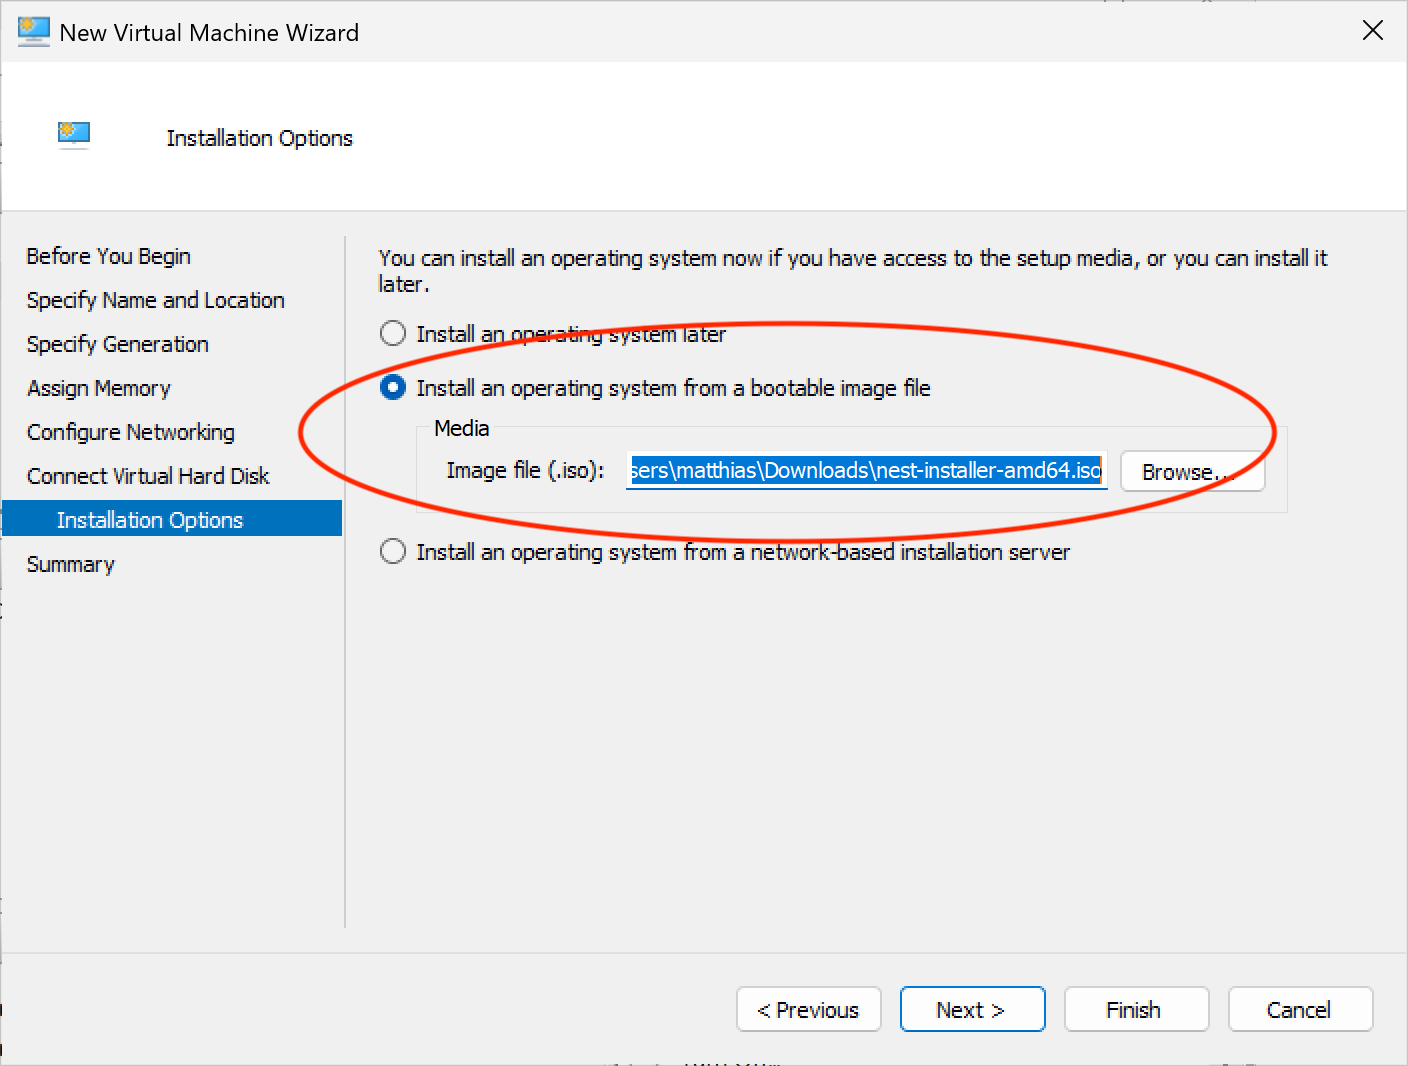
Click Finish.
Before starting the VM, right-click it and open Settings:
Security: uncheck Enable Secure Boot.

Processor: set the number of virtual processors (see VM Settings above).
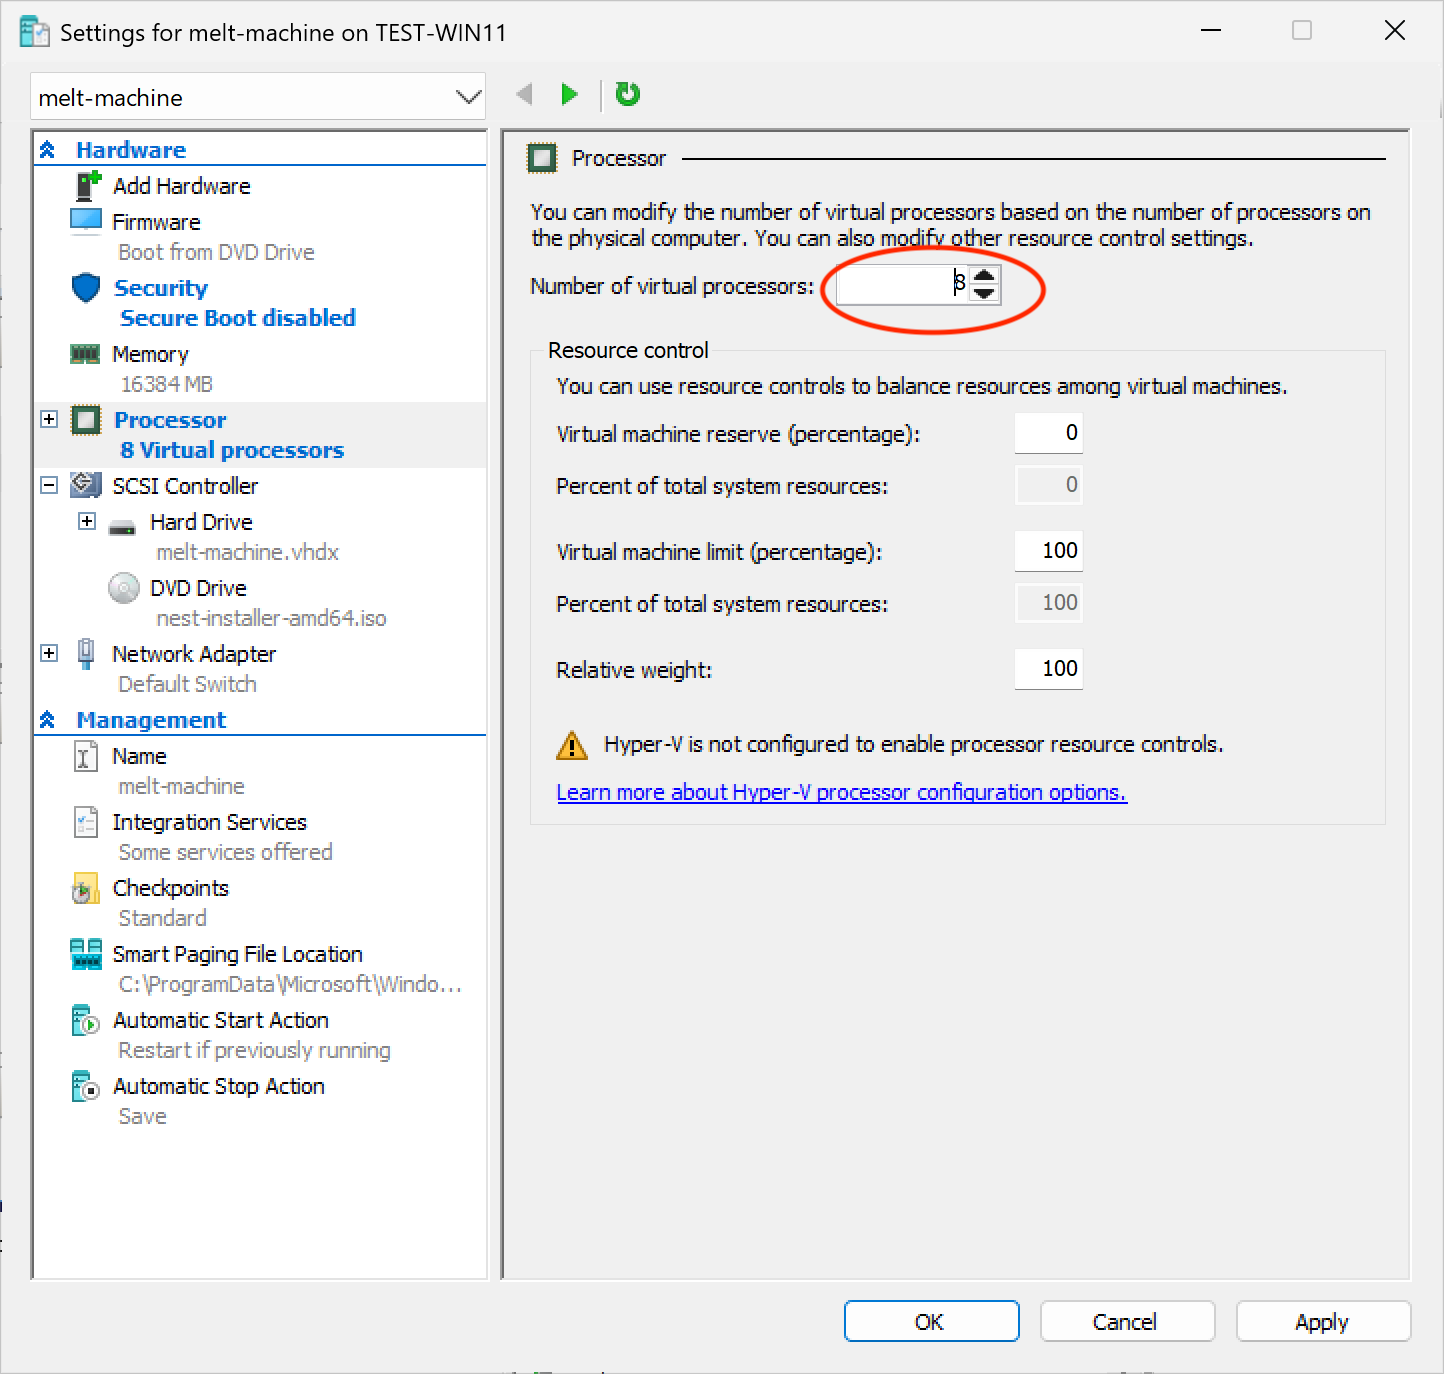
Click Apply to save the settings.
Nested virtualization (Elastic Pools)
For Machines that will host Elastic Pools, nested virtualization must be enabled via PowerShell (there is no GUI toggle):
Set-VMProcessor -VMName "melt-machine" -ExposeVirtualizationExtensions $trueStart the VM.
Next Steps
- Nest: follow the on-screen TUI installer. In the Networking tab, select Static IPs instead of the default DHCP (see warning above).
- Machine: after it boots from the Enrollment Image it enrolls automatically and appears under Machines. Continue with Assign to a Machine Pool.
Other Virtualization Tools
VirtualBox
VirtualBox's default NAT networking mode does not allow the host to reach the VM. Since you typically need to access the Nest web UI from the host, this makes VirtualBox impractical for running a Nest without extra port-forwarding configuration. Hyper-V is the recommended option on Windows.
VMware Workstation
VMware Workstation should work for both Nest and Machine VMs. By default VMware creates VMs with a BIOS firmware: change the boot mode to UEFI in the VM settings before first boot (VM Settings → Options → Advanced → Firmware type → UEFI). For the Nest, configure Static IPs in the installer as VMware's NAT DHCP likely has the same lease persistence issue as Hyper-V.
Troubleshoot
If the VM has trouble booting or enrolling, check the Enrollment Images – Troubleshooting section.