Enrollment
Registering a computer as a Machine in meltcloud is called Enrollment.
Enrollment follows the same basic principle as installing any Linux distribution: you boot from a live ISO and an operating system is written to disk. In meltcloud, this process is done automatically as enrollment.
The complete process consists of four steps:
- Create an Enrollment Image: Generate a customized ISO that knows how to join your meltcloud installation.
- Boot from the ISO: Start the server using this image (via USB, virtual media, or network boot – see the next chapter for options).
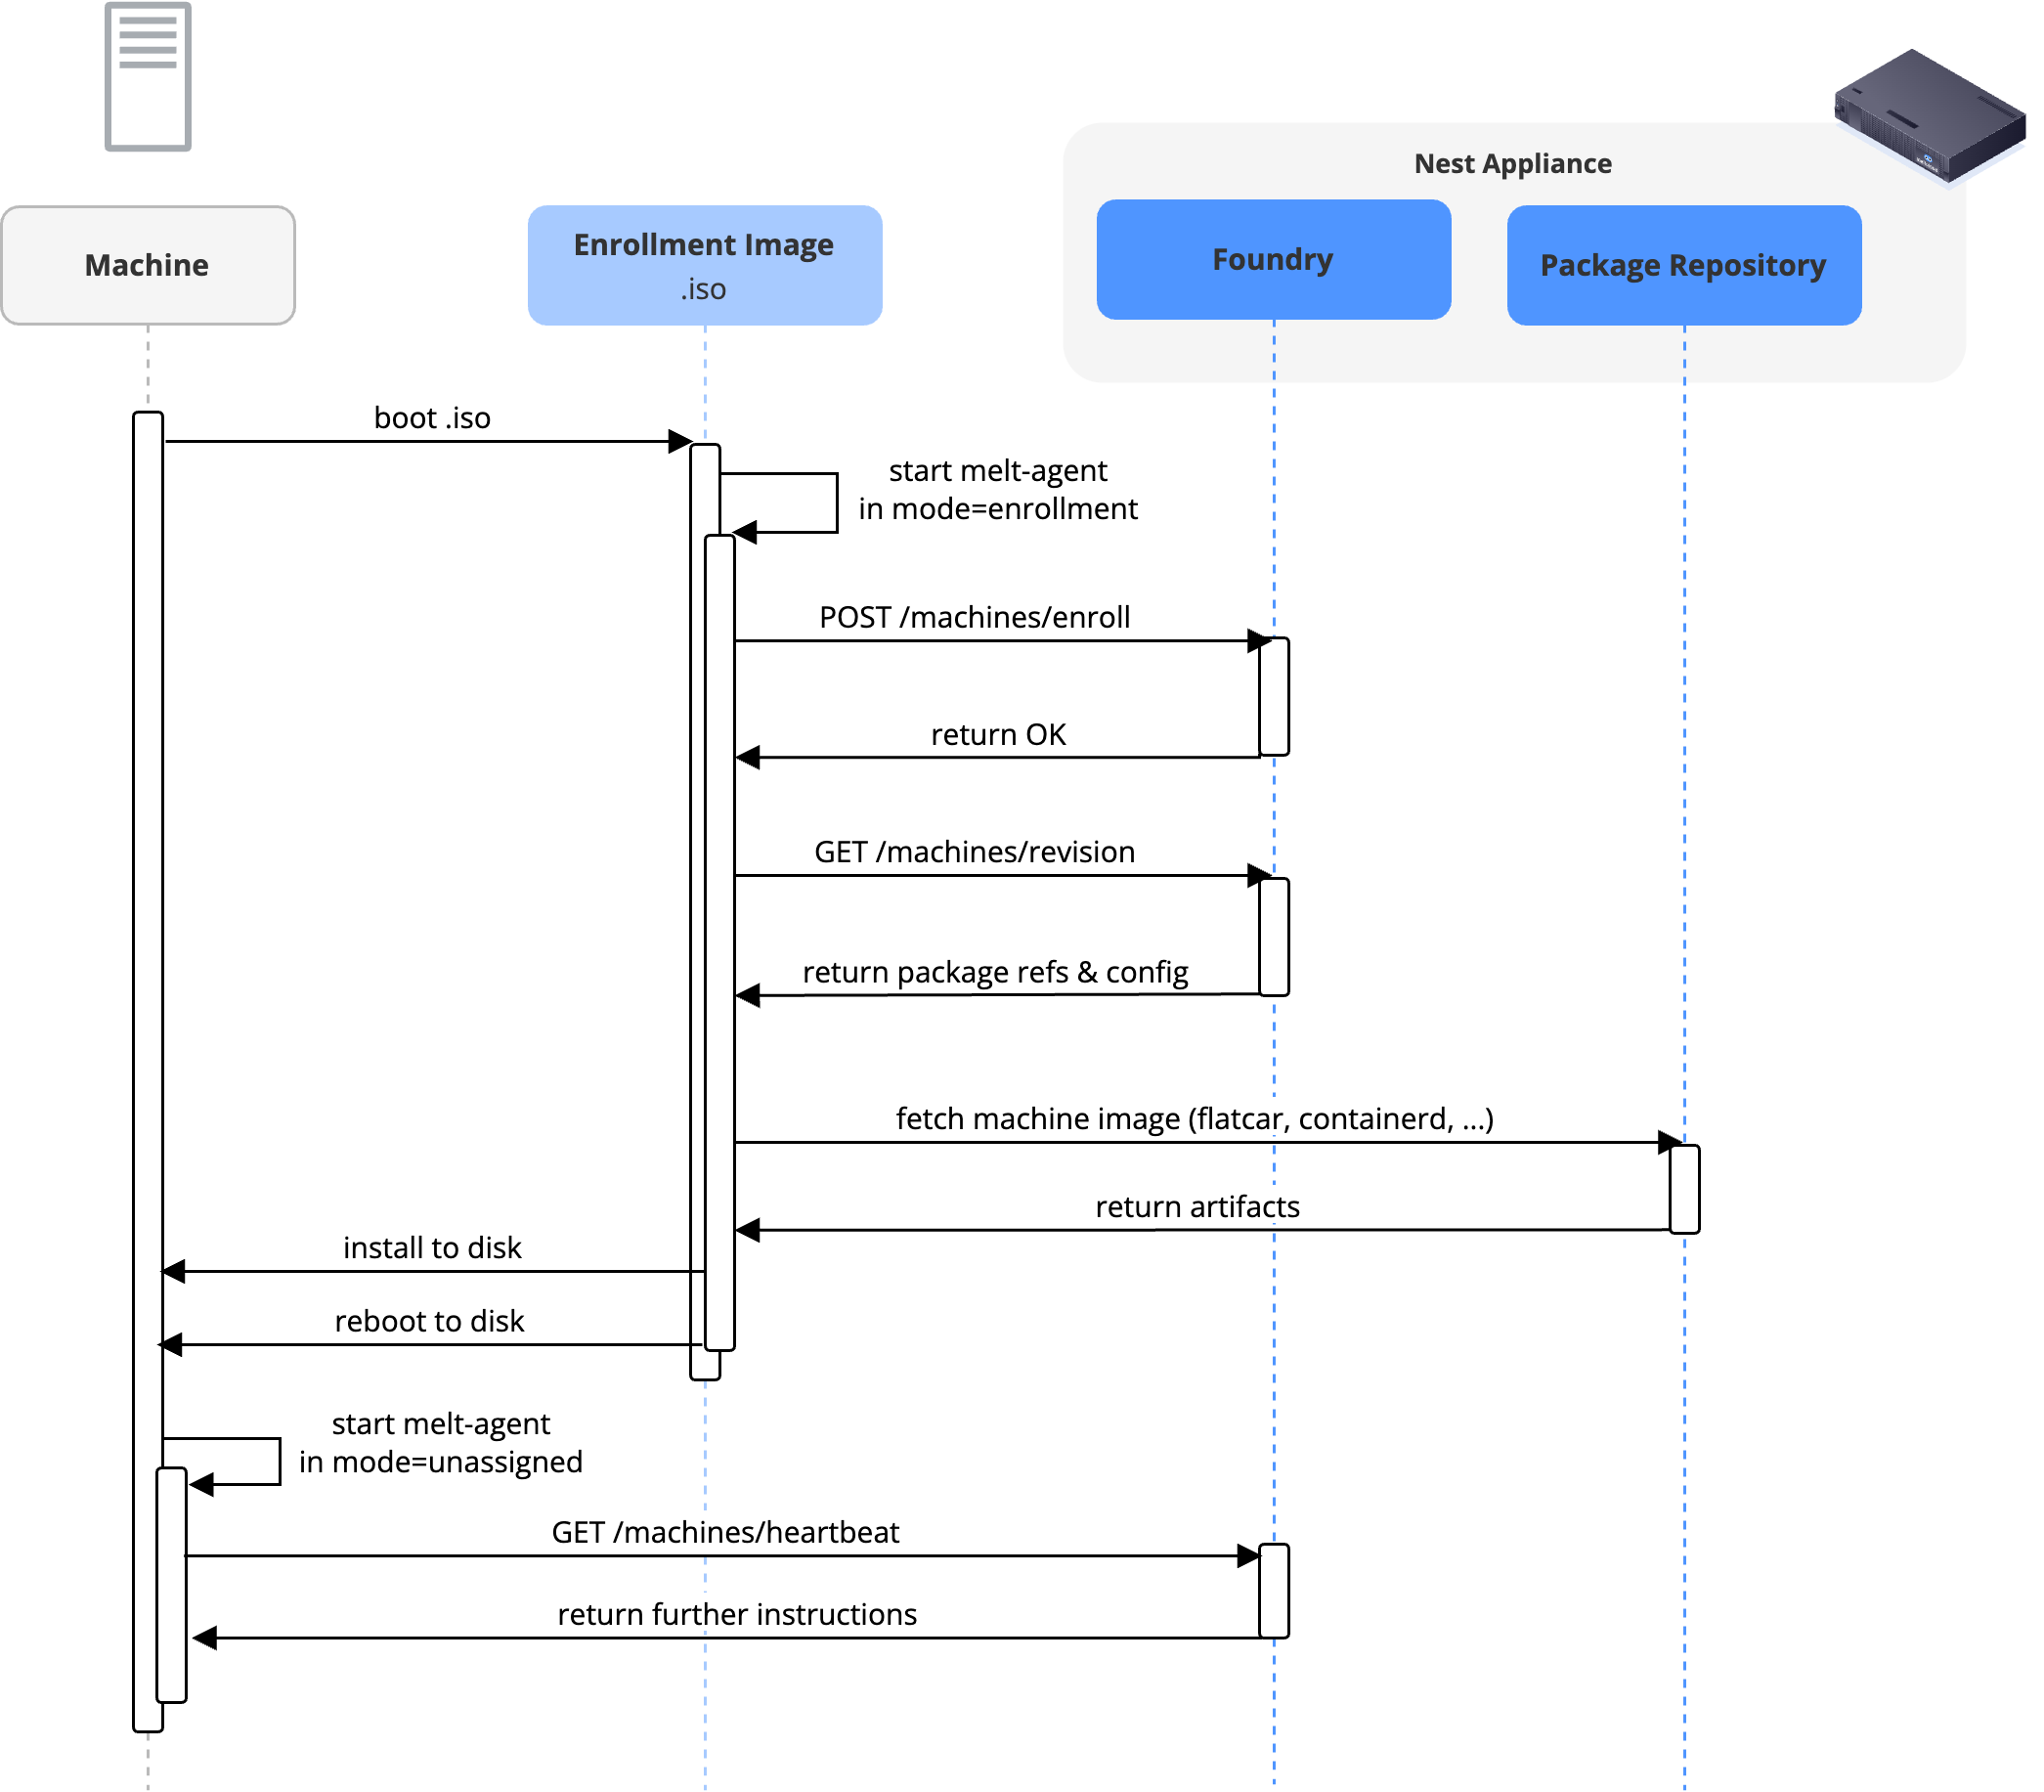
- Enrollment happens: The meltcloud agent contacts Nest, establishes trust by generating Machine-specific credentials, and installs the Machine Image with the correct configuration.
- Reboot: The system now starts as a managed Machine in meltcloud.
More in-depth, the sequence looks as follows:
How to Boot from the .iso
There are several ways to boot a server from an ISO image. Which one you use depends on your hardware, scale, and automation needs.
TIP
For network-based methods, meltcloud makes things easier: whenever you create an enrollment image, it also generates ready-to-use URLs that deliver the ISO. These can be used directly as BMC virtual media targets or as a UEFI HTTP Boot URL, so servers can boot straight from Nest without having to attach or distribute ISO files manually.
In practice, the options boil down to three common approaches:
Attach the ISO as a USB Dongle
The classic method: download the ISO, write it to a USB stick and plug it into the server.
- Simple and reliable
- Scales only for a handful of Machines or edge deployments
Attach the ISO as BMC Virtual Media
Most servers have a Baseboard Management Controller (BMC) that can present an ISO to the system as if it were locally attached media. This can be done in two ways:
- Single server (browser streaming): Mount the ISO directly via the BMC web UI. Convenient when you have physical access only through management, but depending on the BMC and implementation, initial boot can take 5-20 minutes since the ISO is streamed over the browser connection.
- Multiple servers (Redfish): Automate mounting via the Redfish API. This differs between vendors (example: HPE Redfish Virtual Media), and tools like Terraform (dell-redfish-terraform-provider) can integrate with these APIs. Instead of hosting the ISO yourself, you can point the BMC directly to the URL generated by meltcloud when you create the enrollment image. However:
- Most vendors don't support HTTPS.
- Larger images can be flaky or slow due to the BMC’s limited bandwidth and processing power.
Network Boot the ISO via UEFI HTTP Boot
The modern, scalable option: boot the server directly over its primary NIC using UEFI HTTP Boot.
- Native UEFI can fetch ISOs via HTTP(S): Just configure the HTTP Boot URL (either in the BIOS or via DHCP option) to the ISO URL generated in meltcloud.
- This is the recommended approach: fastest and most reliable, since it bypasses the BMC and uses the server’s real network interfaces
WARNING
Customers must verify that their hardware truly supports this, especially when using HTTPS. Many vendors’ implementations are incomplete or require special CA enrollment. Testing on your specific server model is strongly advised.