
Create a Local VM on macOS
On macOS you can run a meltcloud Nest or Machine as a local VM. This is handy for trials, PoCs and learning before you move to bare metal.
Tool Comparison
Three options are available, each with different tradeoffs:
| tart | UTM (Apple Virtualization) | UTM (QEMU) | |
|---|---|---|---|
| Interface | CLI | GUI | GUI |
| Apple Silicon | ✓ | ✓ | ✓ |
| Intel Mac | ✕ | ✕ | ✓ |
| Nested virtualization | ✓ M3+, macOS 15+ | ✓ M3+, macOS 15+ | ✕ |
| Inter-VM networking | ✓ Softnet | ✕ VMs are isolated | ✓ vmnet-shared |
Inter-VM networking is required when running a Nest and Machines on the same host (Nest ↔ Machine, Machine ↔ Machine). Nested virtualization is required for Elastic Node Pools / KubeVirt.
Recommendation
For most setups we recommend tart: it supports both inter-VM networking and nested virtualization on Apple Silicon M3+.
VM Settings
Pick the column matching what you want to run:
| Setting | Nest | Machine |
|---|---|---|
| Architecture | host arch (arm64 or amd64) | host arch (arm64 or amd64) |
| vCPU | 4+ | 2+ |
| RAM | 10 GiB+ | 4 GiB+ |
| Disk | ≥ 200 GiB | ≥ 30 GiB (depends on the amount of container images) |
| Nested virtualization | not required | optional, required for Elastic Node Pools |
| Boot media | Nest installer .iso | Enrollment Image .iso |
Option A: tart
Install tart with Homebrew:
brew install cirruslabs/cli/tartCreate and start the VM:
# create a Linux VM with a 215 GB disk (~200 GiB; tart uses decimal GB)
tart create --linux --disk-size 215 melt-nest

# set CPU and memory (in MB)
tart set melt-nest --cpu 4 --memory 10240

# boot from the Nest installer ISO
# uses default Shared networking; do NOT use --net-softnet (blocks Nest floating IPs)
tart run melt-nest --disk /path/to/nest-installer-v*-arm64.iso# create a Linux VM (30 GB is plenty for a worker; tart uses decimal GB)
# change the name to create multiple machines (e.g. worker1, worker2)
tart create --linux --disk-size 30 melt-machine
# set CPU and memory (in MB)
tart set melt-machine --cpu 2 --memory 8192
# boot the Enrollment Image
# --net-softnet + --net-softnet-allow: enables inter-VM traffic so the Machine can reach the Nest
tart run melt-machine \
--net-softnet --net-softnet-allow=0.0.0.0/0 \
--disk /path/to/enrollment-image-arm64.iso# create a Linux VM (30 GB is plenty for a worker; tart uses decimal GB)
tart create --linux --disk-size 30 melt-machine
# set CPU and memory (in MB)
tart set melt-machine --cpu 2 --memory 8192
# boot the Enrollment Image
# --net-softnet + --net-softnet-allow: enables inter-VM traffic so the Machine can reach the Nest
# --nested: enables nested virtualization for Elastic Node Pools (requires M3+ Mac on macOS 15+)
tart run melt-machine \
--net-softnet --net-softnet-allow=0.0.0.0/0 \
--nested \
--disk /path/to/enrollment-image-arm64.isoVM window not appearing?
tart may not bring the VM window to the foreground. See Troubleshoot: tart VM window doesn't appear.
Option B: UTM with Apple Virtualization
WARNING
UTM with the Apple Virtualization backend isolates VMs from each other. Use this option only for single-VM setups (e.g., a Machine enrolling against SaaS meltcloud). For setups where Machines need to reach a local Nest, use tart instead.
Install UTM from mac.getutm.app, the Mac App Store, or Homebrew:
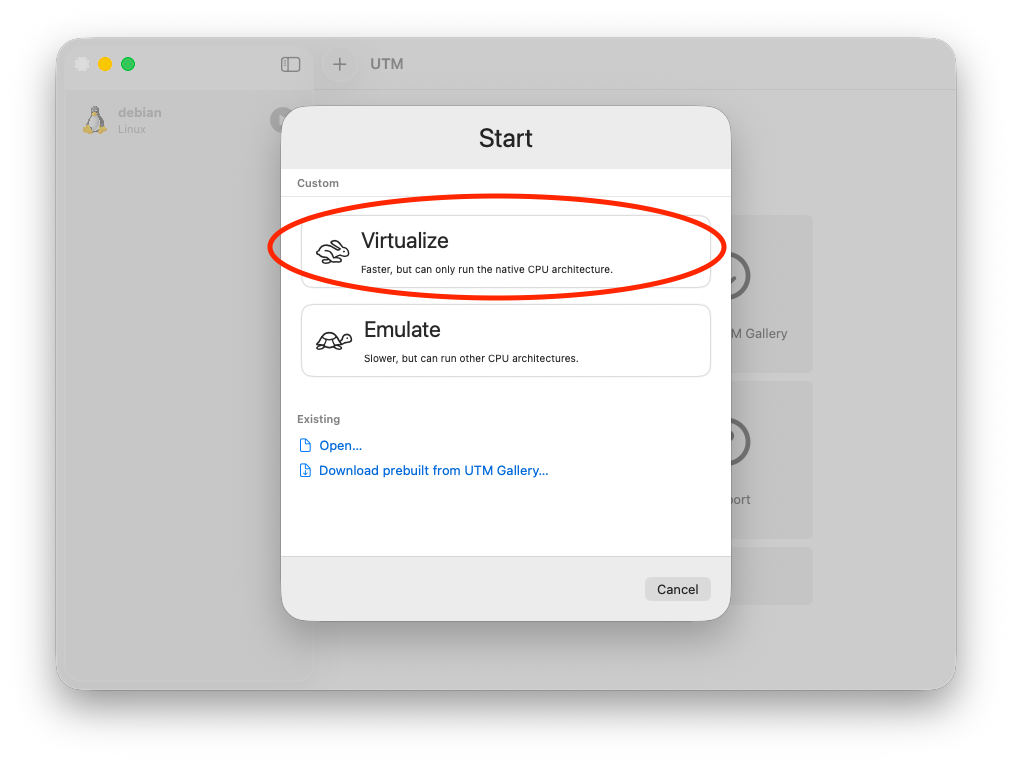
shellbrew install --cask utmClick the + button in the toolbar, then choose Virtualize (native speed on Apple Silicon; do not pick Emulate).
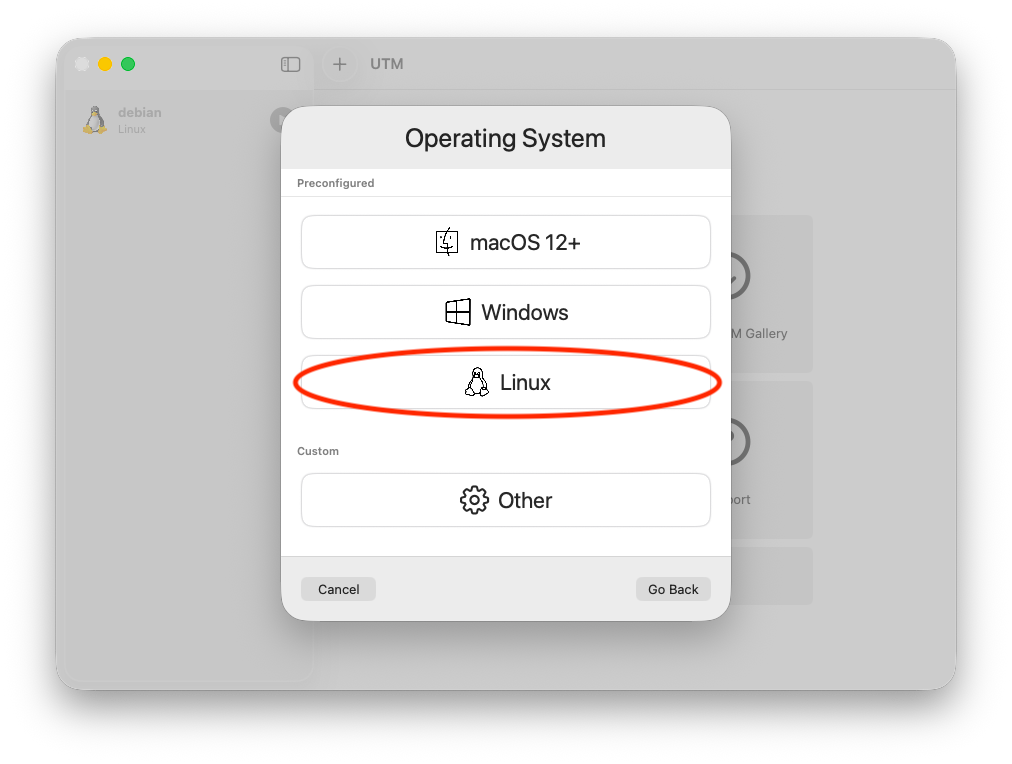
Under Operating System, choose Linux.
Hardware: set Memory (e.g.
10240MiB for a Nest) and CPU Cores (leave Default, or set per the table above).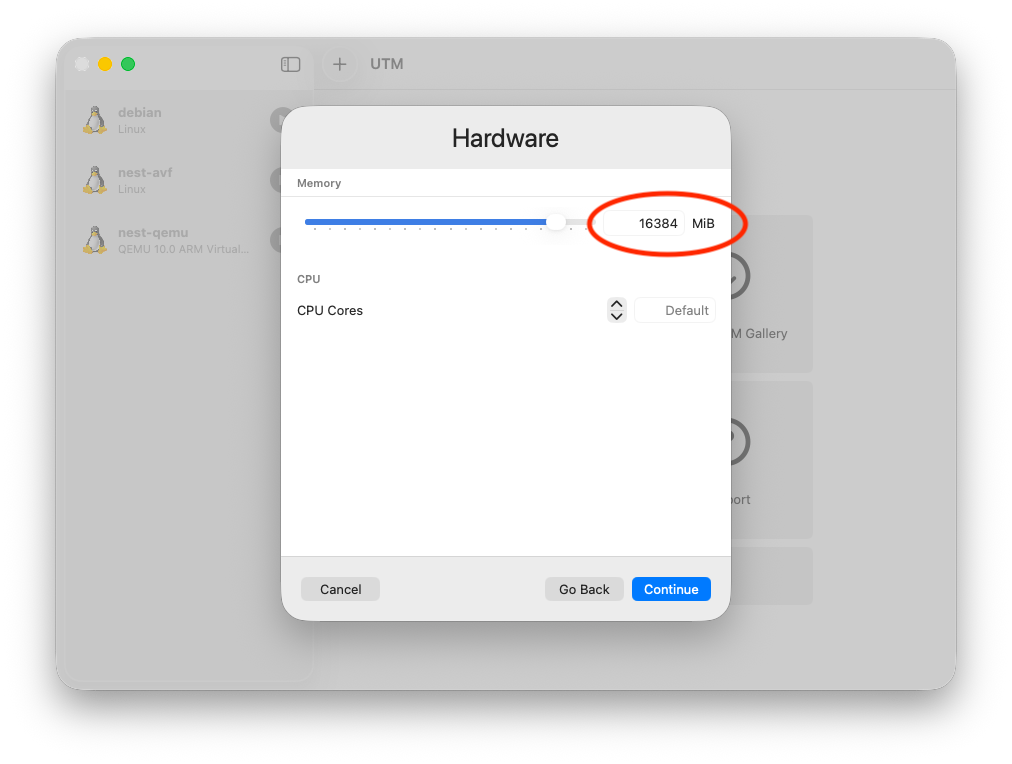
Boot: leave Use Apple Virtualization checked, select Boot from ISO image, and Browse to your
.iso(Nest installer or Enrollment Image).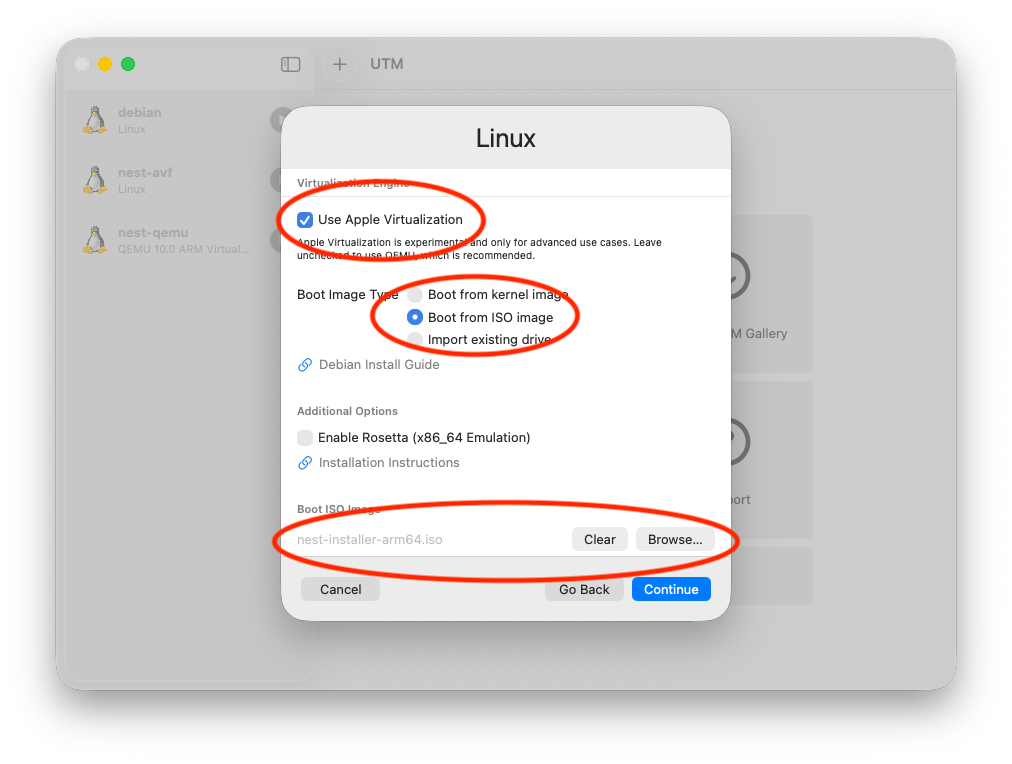
Storage: set the drive size (see VM Settings above).
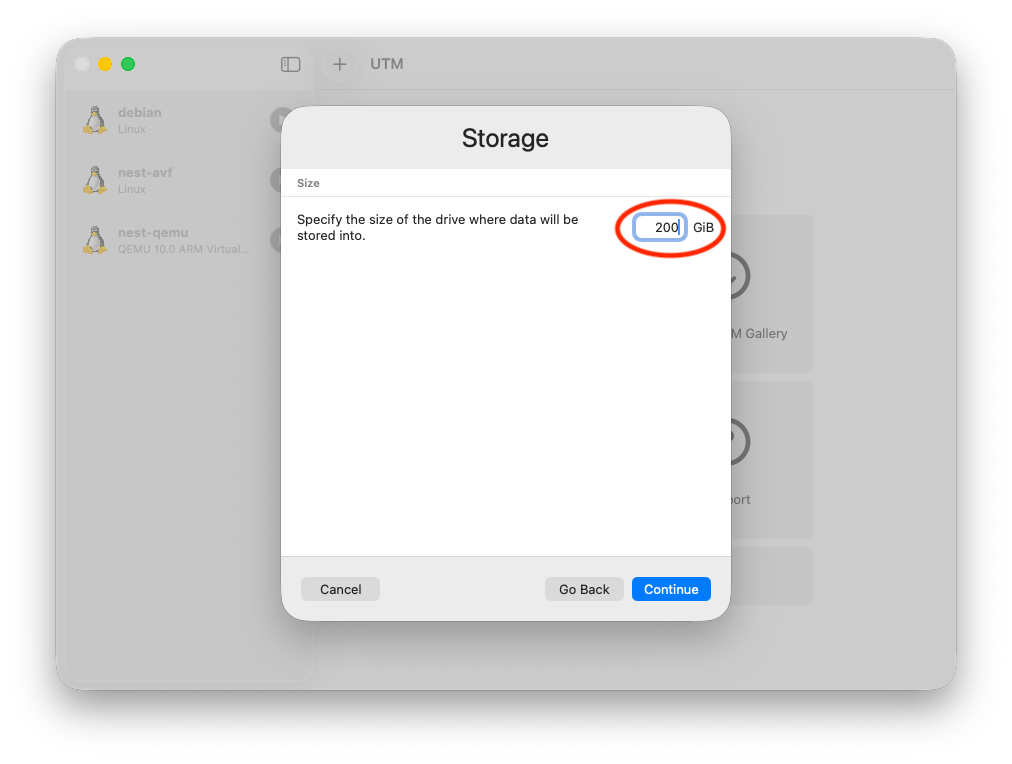
Shared Directory: skip this step.
Summary: give the VM a name (e.g.
nest) and Save.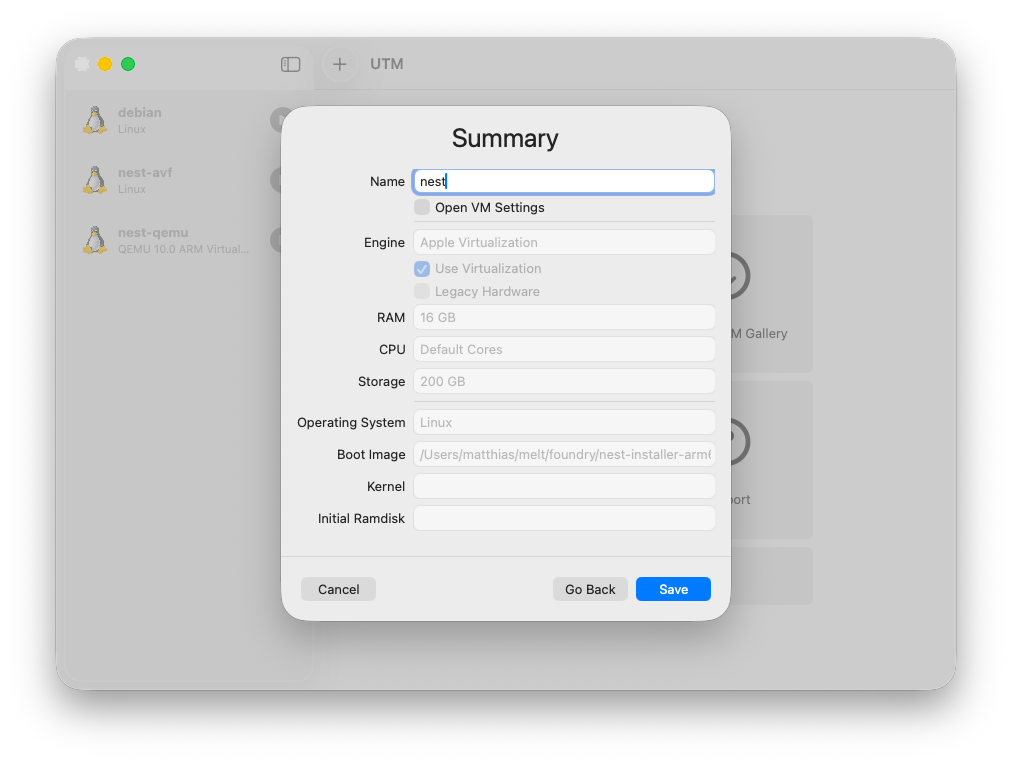
Start the VM. It boots from the
.iso.
Nested virtualization (Elastic Node Pools)
For Machines that will host Elastic Node Pools, nested virtualization is required. UTM enables it automatically on M3 or newer Macs running macOS 15+.
Option C: UTM with QEMU
WARNING
UTM with the QEMU backend supports both Apple Silicon and Intel Macs and inter-VM networking (via vmnet-shared), but does not support nested virtualization (Elastic Node Pools won't work).
Install UTM from mac.getutm.app, the Mac App Store, or Homebrew:
shellbrew install --cask utmClick the + button in the toolbar, then choose Virtualize (do not pick Emulate).
Under Operating System, choose Linux.
Hardware: set Memory (e.g.
10240MiB for a Nest) and CPU Cores (leave Default, or set per the table above).Boot: uncheck "Use Apple Virtualization", select Boot from ISO image, and Browse to your
.iso(Nest installer or Enrollment Image).Intel Macs
On Intel Macs, use the amd64 Nest installer or Enrollment Image. "Use Apple Virtualization" is not available on Intel, so UTM always uses the QEMU backend.
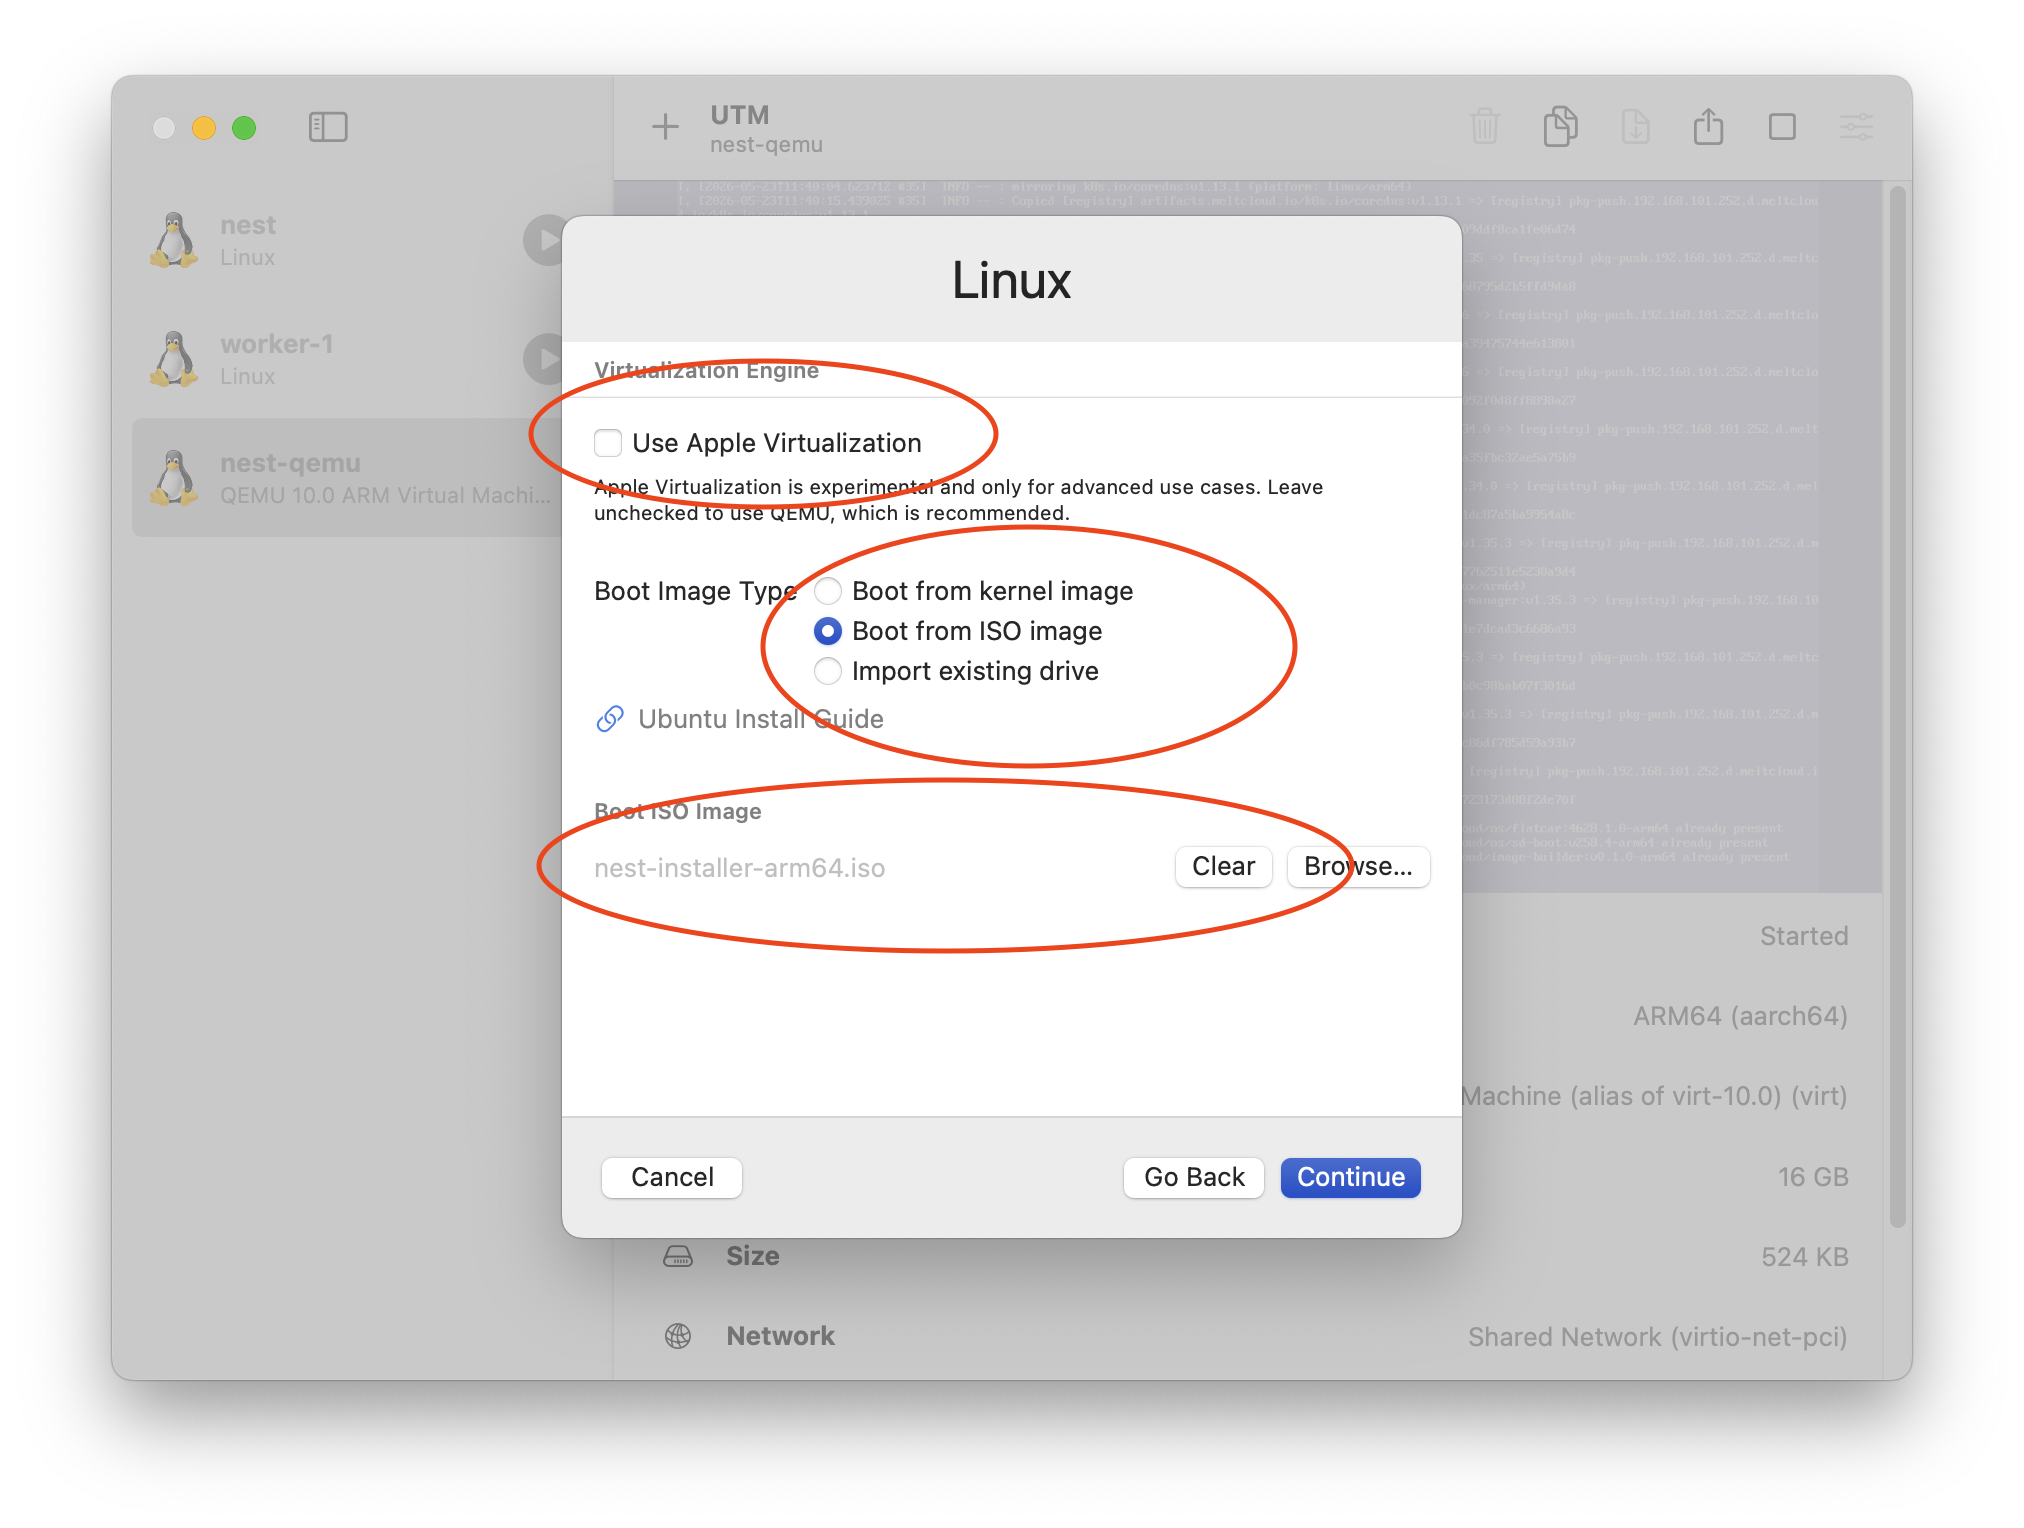
Storage: set the drive size (see VM Settings above).
Shared Directory: skip this step.
Summary: give the VM a name (e.g.
nest) and Save.Start the VM. It boots from the
.iso.
WARNING
After the Nest or Machine installation completes, you must remove the ISO from the VM. QEMU does not respect boot order changes, so the VM will keep rebooting into the installer. See VM keeps rebooting into the installer (UTM with QEMU).
Next Steps
- Nest: follow the on-screen TUI installer.
- Machine: after it boots from the Enrollment Image it enrolls automatically and appears under Machines. Continue with Assign to a Machine Pool.
Troubleshoot
tart VM window doesn't appear
tart may not bring the VM window to the foreground on some macOS versions. We also stumbled upon this, there are even GitHub issues (#928, #1131) for it.
No internet or host can't reach the VM (UTM)
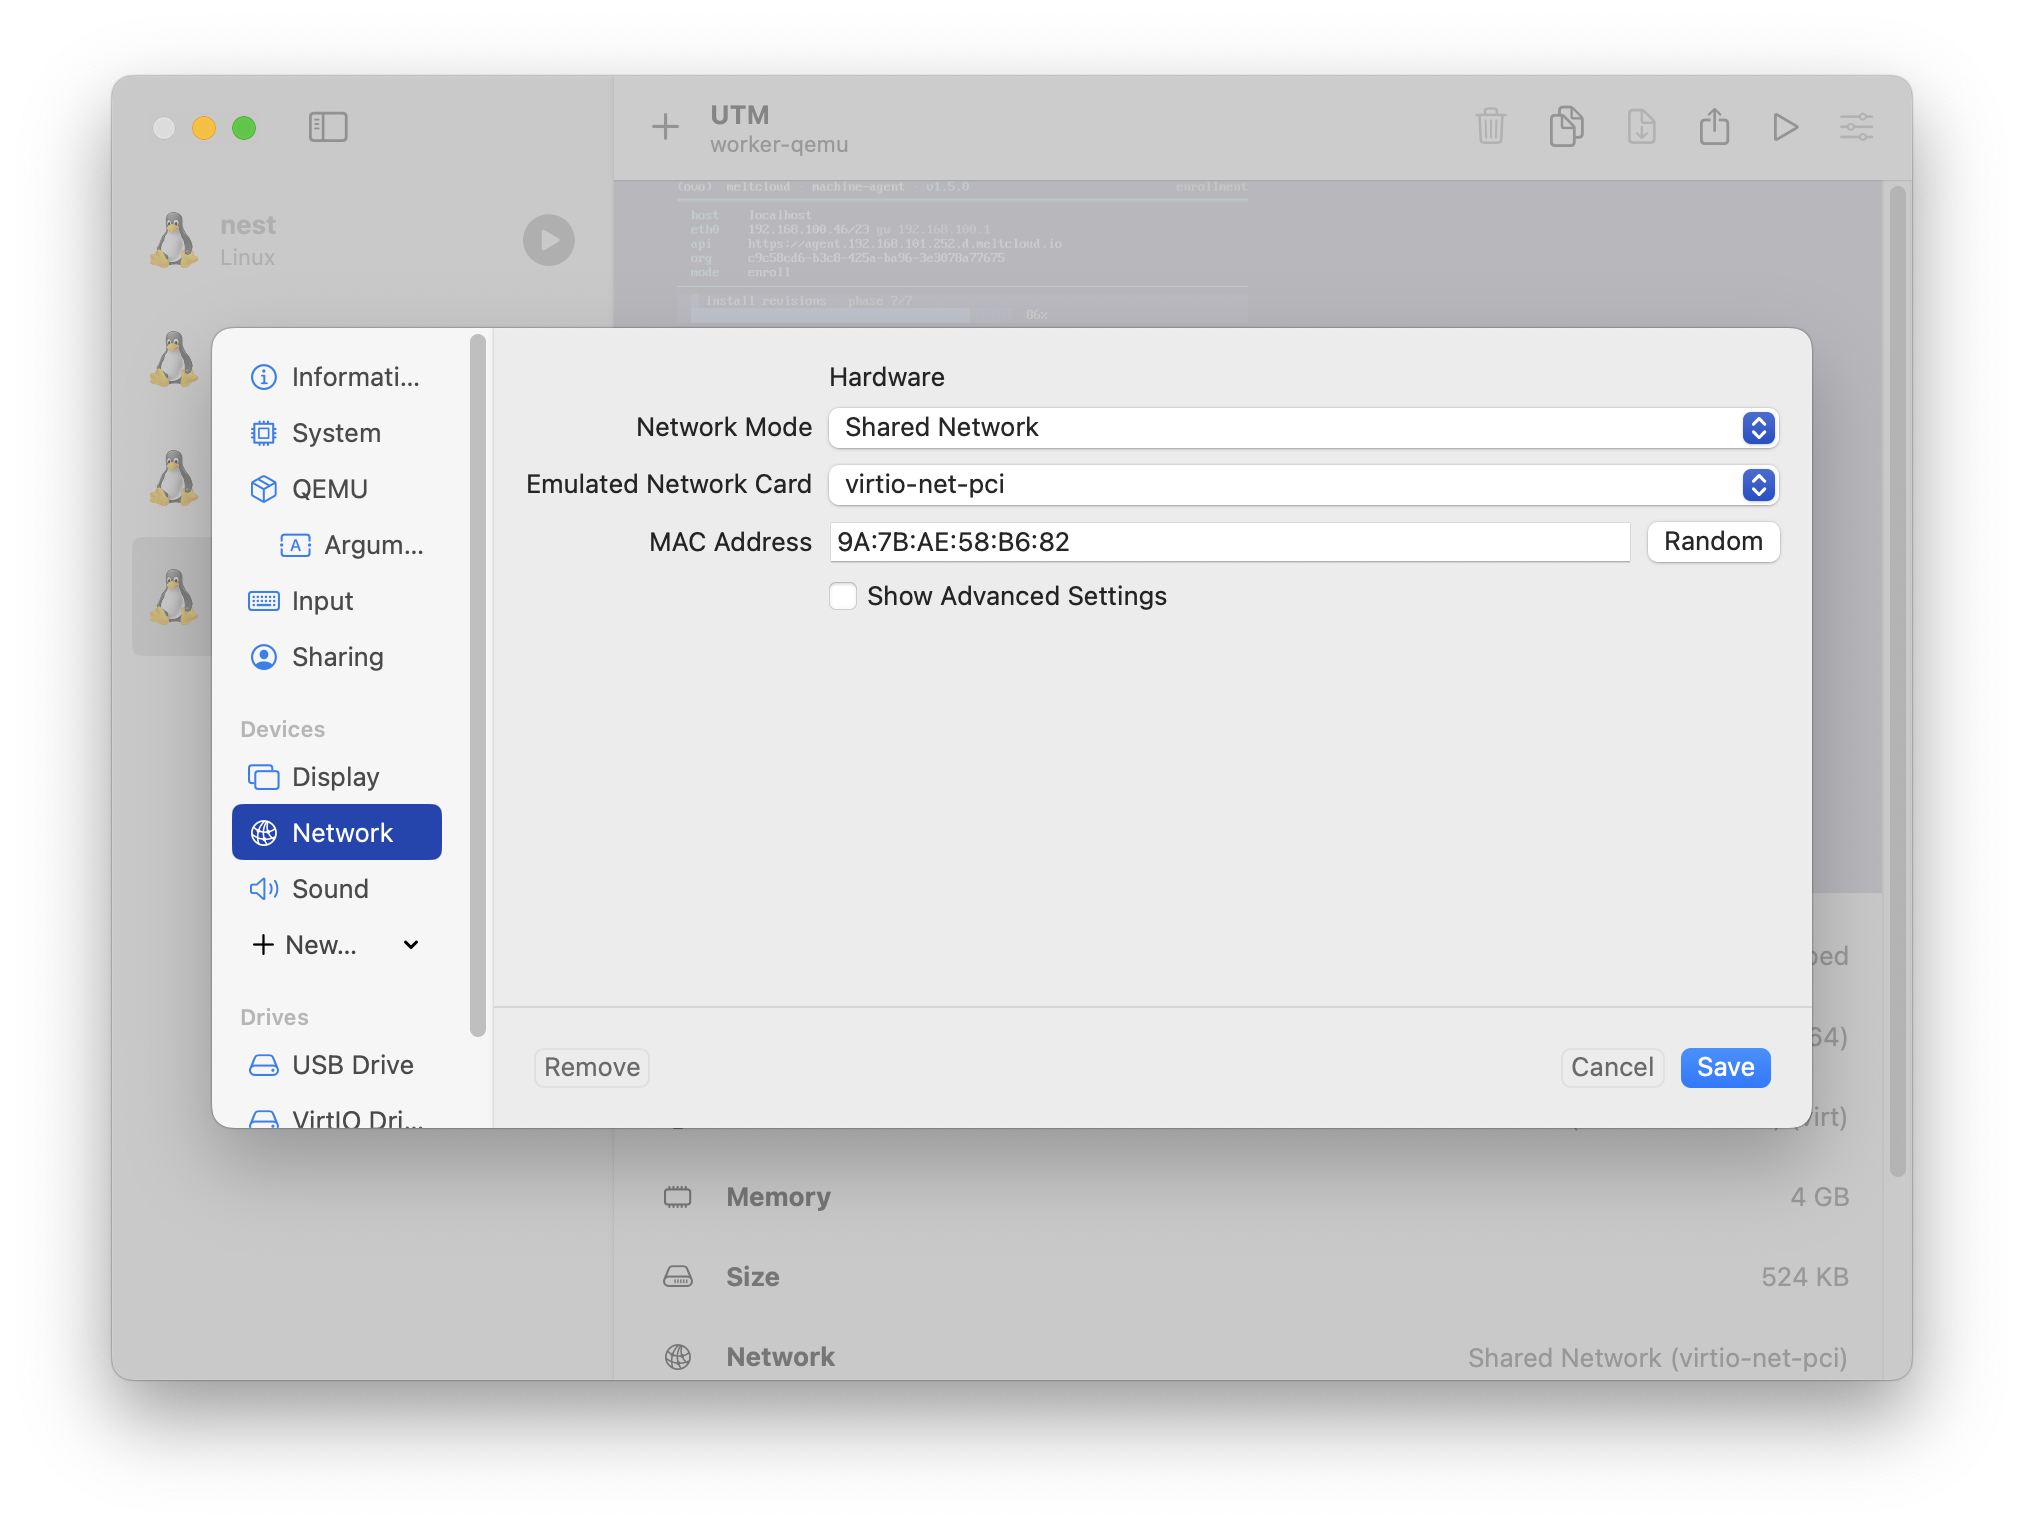
Open the VM's Settings → Network and confirm Network Mode is Shared Network.
Apple Virtualization backend:
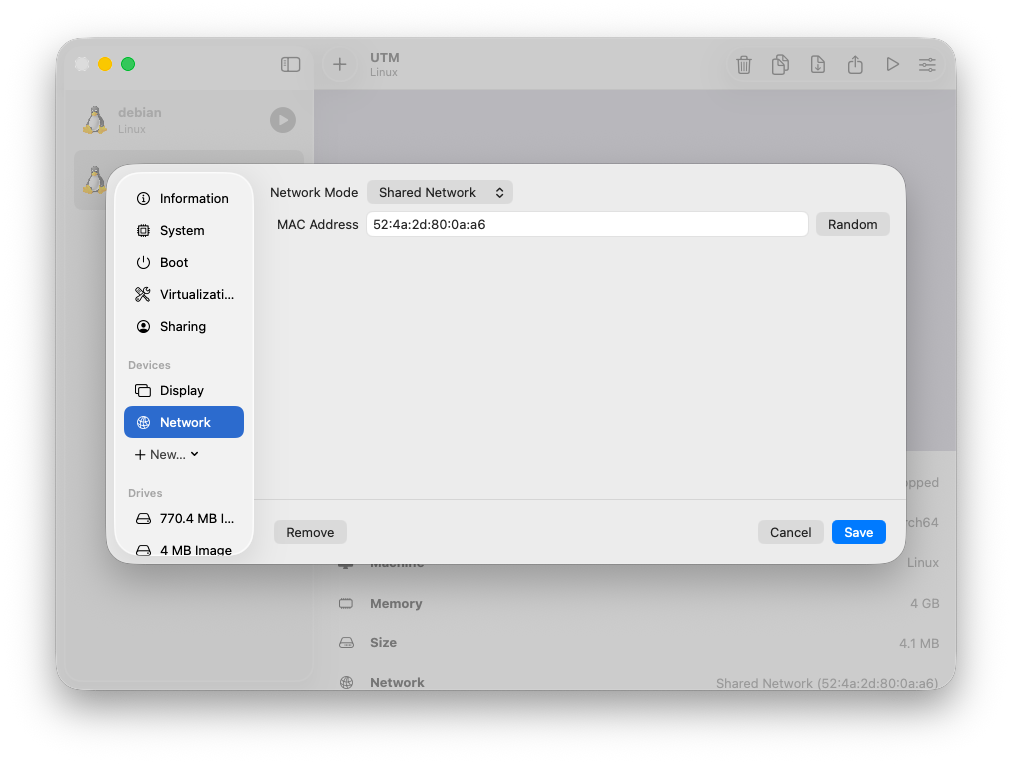
QEMU backend:
VMs can't reach each other (UTM with Apple Virtualization)
This is a known limitation. UTM's Apple Virtualization backend isolates VMs from each other on the Shared Network. VMs cannot communicate with each other, even when running on the same host.
If you need inter-VM networking (e.g., Machines reaching a local Nest), use tart with Softnet (see Option A) or UTM with the QEMU backend (see Option C), which uses vmnet-shared and supports inter-VM traffic.
VM keeps rebooting into the installer (UTM with QEMU)
QEMU does not respect boot order changes made by the installer. After the Nest or Machine installation completes, the VM will keep rebooting into the installer ISO instead of booting from disk.
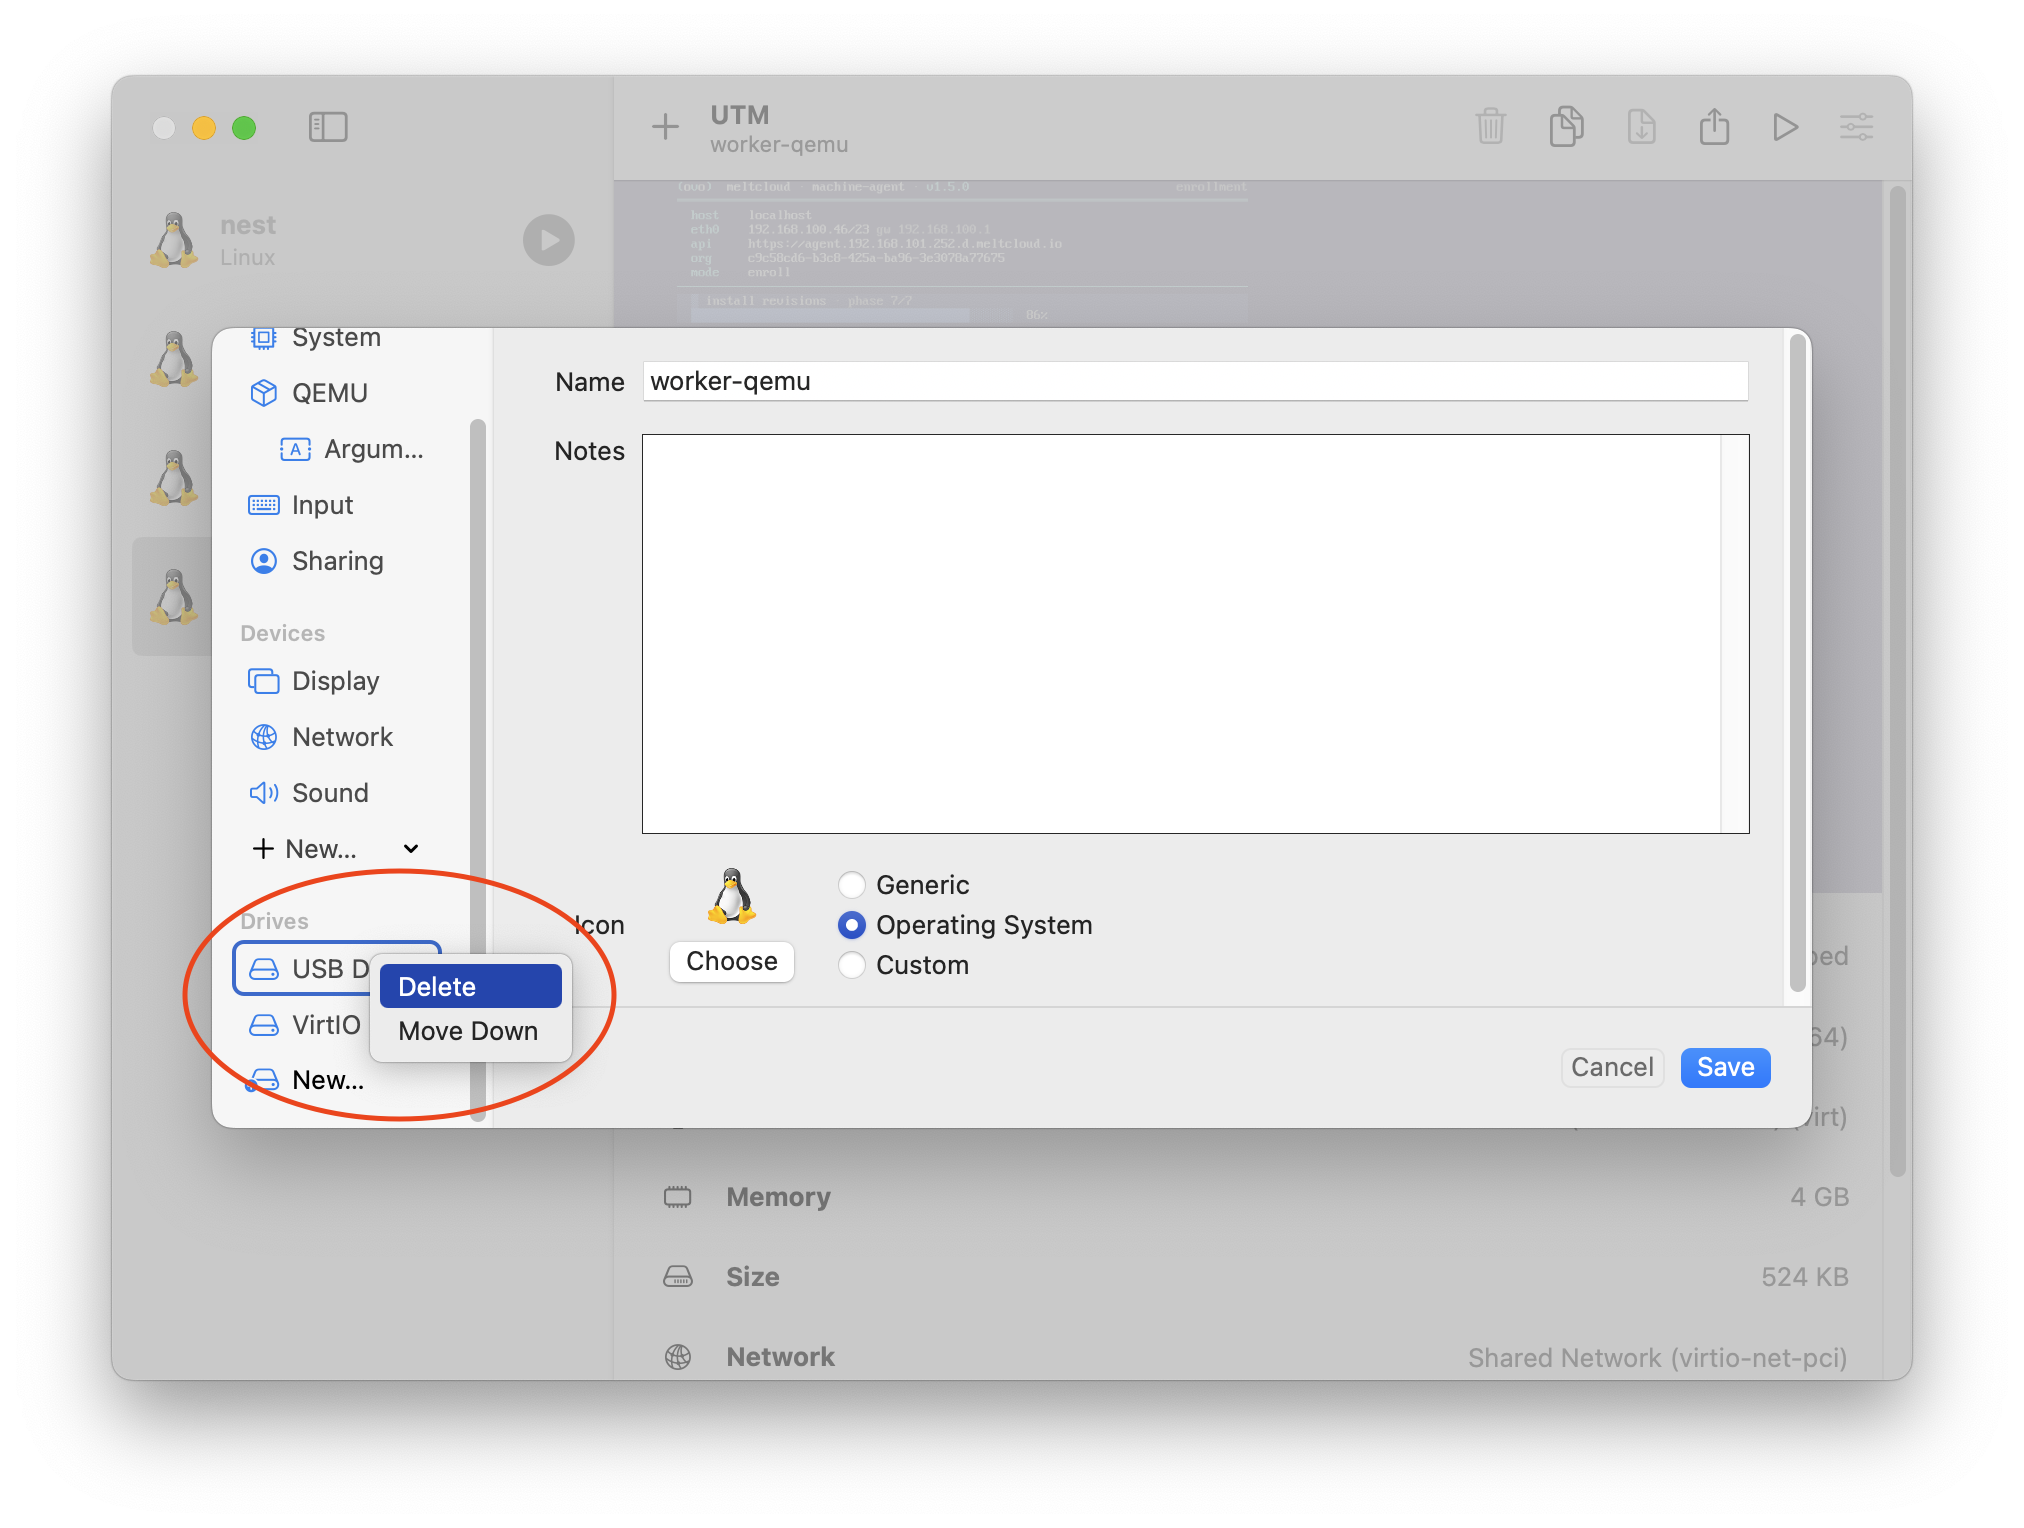
To fix this, stop the VM and remove the ISO drive: open the VM's Settings, right-click the USB Drive entry under Drives, and click Delete.
Machine cannot reach the Nest (tart)
Intra-VM connectivity between different vmnet implementations (e.g. Softnet and Apple Virtualization Framework, as used by tart) can randomly break on macOS. Two options:
- Reboot the Mac. This sometimes seems to fix the issue.
- Flush the network isolation table:shell
sudo pfctl -a 'com.apple.internet-sharing/network_isolation' -t network_isolation_table_v4 -T flush
Nest Breaks After Host or VM Reboot (tart / UTM)
Apple's vmnet framework can reassign a completely new subnet range to the VM bridge after a host or VM reboot. When this happens, the Nest loses connectivity, because its address no longer belongs to the new subnet.
There is currently no workaround on macOS. Unlike Hyper-V, where you can create a NAT switch with a fixed subnet, macOS does not expose control over vmnet subnet assignments. Reinstalling the Nest with the new subnet's IP range is the only option after a subnet change.
macOS 26 introduces a network topology API that may allow pinning the subnet. Lima already adopted this API; tart has not yet. See tart discussion #1282 for the upstream tracking which might fix our issue and make the setup more stable.
Disk path must match the Enrollment Image (Machines)
Apple's Virtualization framework presents the disk as a virtio device, usually /dev/vda. The install disk path you chose when creating the Enrollment Image must match, or enrollment fails. If it does, create another Enrollment Image with the correct disk path. The Enrollment Logs show the exact error.
If the VM has trouble booting or enrolling, check the Enrollment Images: Troubleshooting section.