
SaaS: Cluster with Local VM
A typical meltcloud Kubernetes Cluster consists of a Nest-hosted Kubernetes control plane and worker nodes called Machines.
TIP
This tutorial uses the meltcloud SaaS to host the control plane and a local VM as a worker node. In production, you would deploy your own Nest on-premises and enroll bare metal servers as workers.
Follow these steps to set up a fully managed Kubernetes Cluster in just a few minutes.
Create a Cluster
- Request a Free Trial for app.meltcloud.io.
- Log in to app.meltcloud.io
- Navigate to Clusters → Create Cluster to create a Cluster by providing a unique name and the Kubernetes version you'd like to use.
- Hit Create Cluster. You can now observe how the control plane is being provisioned by following the operations log:
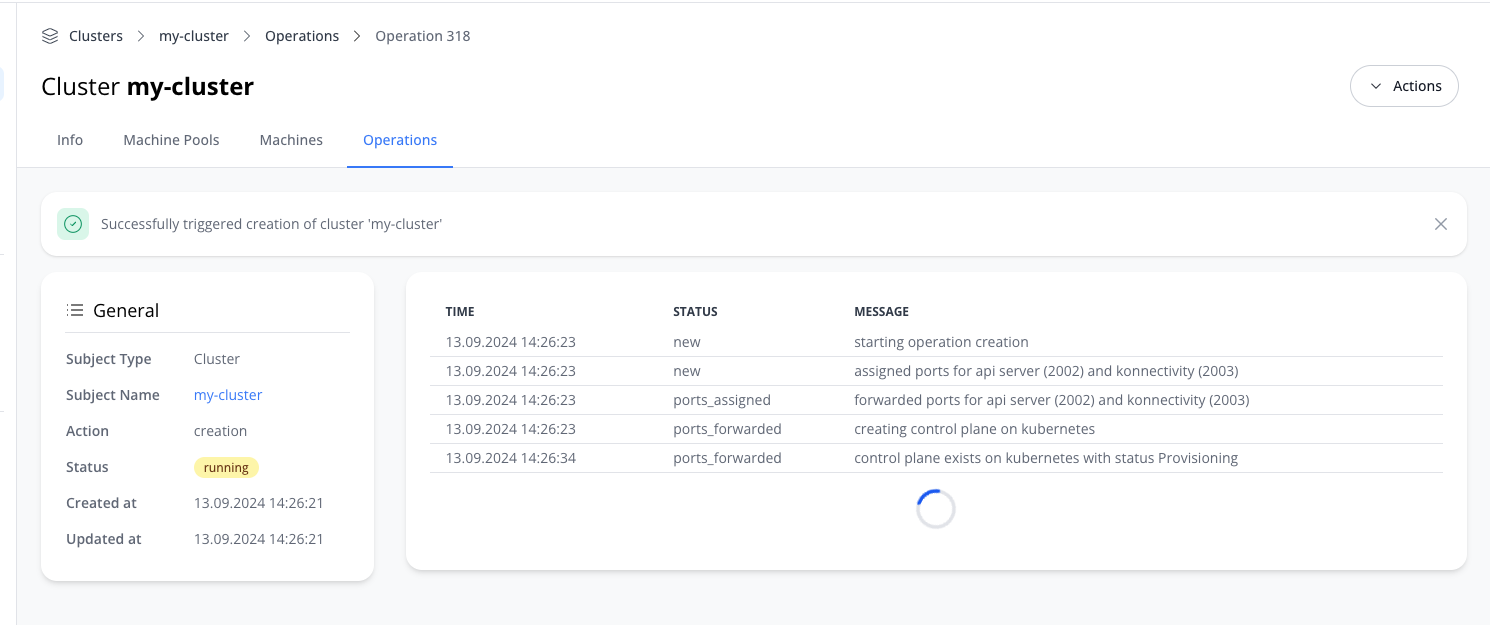
Once your cluster is ready, grab the .kubeconfig (Admin) file from the Info page, which will grant you full access to the cluster.
$ export KUBECONFIG=/path/to/my/cluster.kubeconfig
$ kubectl cluster-info
Kubernetes control plane is running at ...

$ kubectl get nodes
# no nodes created yet
Create a Machine Pool
A Machine Pool is used as a grouping entity where you will later assign your Machines to.
Machine Pools share a set of common configuration such as Kubelet version or Network Profiles.
- After the cluster has been created, navigate to the Machine Pools tab in the newly created cluster.
- Choose an appropriate name and leave the default version
- Hit Save Machine Pool.
Create an Enrollment Image
Enrollment Images enable your Machines to securely enroll and join your Kubernetes cluster.
- Follow Create Enrollment Image. Select the install disk path matching your virtualization tool (see the hypervisor guide for your platform).
Once finished, download the .iso matching your architecture (amd64 or arm64).
WARNING
Anyone with a valid Enrollment Image might enroll Machines into your organization, so treat it as a secret.
Launch a Virtual Machine
Create a VM using the hypervisor guide for your platform:
Boot the VM from the .iso. It will enroll to meltcloud and reboot once finished. It should look as follows:
Troubleshoot
If your VM has trouble booting, check out the Enrollment Images: Troubleshooting section.
Assign the Machine
- After your Machine started up successfully, go to Machines → Your Machine → Actions → Edit Machine and assign it to the Machine Pool you previously created.
Assigning your Machine to a Machine Pool will automatically trigger a reboot and reconfiguration of your Machine.
Verify Your Cluster
You did it! It's time to verify. Once your Machine reboots, it will automatically join the Kubernetes cluster associated with your Machine Pool.
export KUBECONFIG=/path/to/my/cluster.kubeconfig
kubectl get nodes
# you should see your nodes appear here:
NAME                 STATUS   ROLES           AGE   VERSION
<some-uuid>          Ready    <none>          30s   v1.33.8
The nodes will likely show as NotReady due to the lack of a CNI installation.
For example, to install Cilium as a CNI:
helm repo add cilium https://helm.cilium.io/
helm install cilium cilium/cilium --version 1.16.1 \
   --namespace kube-system \
   --set image.pullPolicy=IfNotPresent \
   --set ipam.mode=kubernetes
Great! You now have a meltcloud-managed Kubernetes Cluster with a local VM worker where you could start deploying things.
This environment is fully managed, which means:
- The control plane is continuously monitored, scaled and upgraded to the latest patch version.
- The Worker Node is continuously monitored and its software (OS, Kubelet, ...) automatically kept up-to-date.
Curious? As next steps, you could:
- Check out how to install on Bare Metal.
- Want to learn how meltcloud could be set up in your DC? Explore our Platform Overview.